
In this DMDE review, we take a close look at one of the most technical data recovery tools available today. DMDE has earned a solid reputation for handling tough cases like damaged partitions, RAID recovery, and complex data loss. But does it live up to its claims in real-world tests? Our team at 7 Data Recovery Experts ran it through its paces to find out.
Quick Verdict
🏆 Best for: Techs and sysadmins dealing with partition issues, RAID setups, or forensic-style recoveries.
DMDE is one of the most powerful low-cost recovery tools for users who know what they’re doing. It’s not flashy, and the interface is a throwback, but under the hood, it delivers solid results. The free edition is surprisingly generous, and the Pro version includes advanced tools like RAID assembly, hex viewing, and disk editing.
Pros
- Affordable one-time license
- Good recovery engine
- Advanced disk tools
- Custom file signature recovery
- RAID reconstruction support
- Available on Windows, macOS, Linux and DOS
- Outdated, technical interface
- Cluttered workflow
- Weak multimedia recovery
- Limited file preview support
- Minimal quality‑of‑life features
- Few signatures included by default unless you add custom ones manually
Overview
DMDE (DM Disk Editor and Data Recovery Software) is developed by DMDE Software, an independent company founded by software engineer Dmitry Sidorov. The tool has been under development since 2006, with infrequent updates. It started as a disk editor for low-level troubleshooting and grew into one of the most popular recovery utilities available to end users.
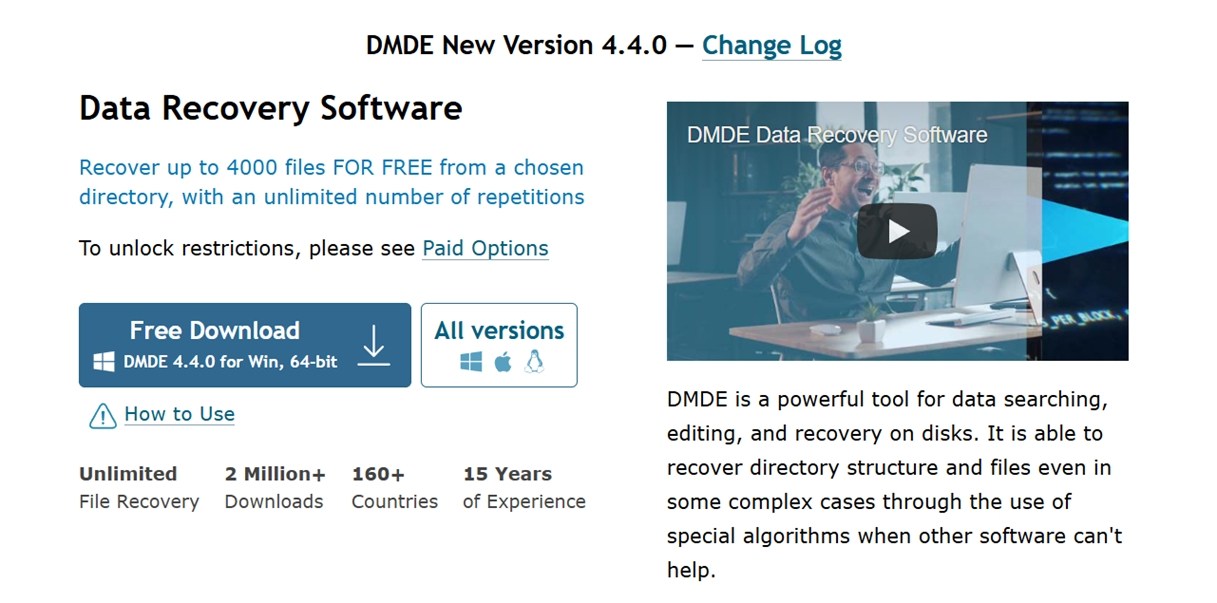
While not a mainstream name, DMDE Software has built a loyal user base in over 160 countries. The official website proudly reports 2 million+ downloads, which is impressive considering the company doesn’t run aggressive ad campaigns like some competitors we’ve seen.
Despite its modest web presence, DMDE is often recommended across forums like /r/datarecovery and /r/DataRecoveryHelp. Anyone familiar with this niche has likely heard the name DMDE come up more than once.
Platform and File System Support
DMDE is one of the few recovery tools that runs across multiple platforms and understands a wide range of file systems – both modern and legacy.
| Operating Systems | Windows, Linux, macOS, DOS |
| File Systems | FAT12 / FAT16 / FAT32, exFAT, NTFS, ReFS, Ext2 / Ext3 / Ext4, HFS+ / HFSX, APFS, Btrfs |
On DMDE’s official download page, you’ll find multiple versions available for each supported platform – including GUI and console builds for Windows (32-bit & 64-bit), macOS, Linux, and even a bootable DOS edition.
Main Features of DMDE
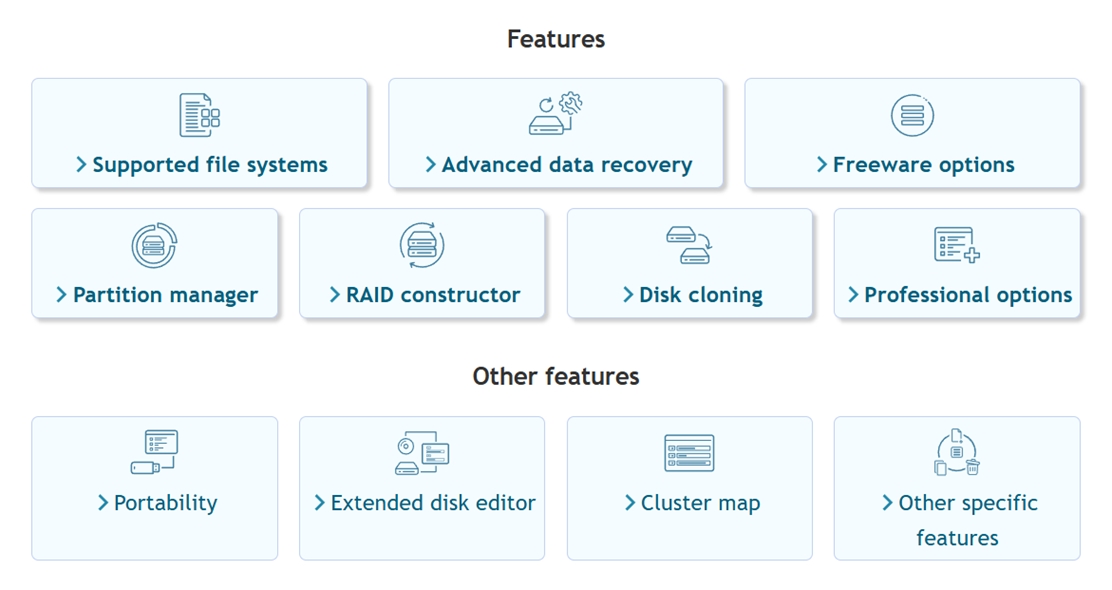
At its core, DMDE is a full-featured recovery tool. It can:
- Undelete files you’ve accidentally removed
- Pull data off formatted drives (if they were quick-formatted)
- Scan RAW partitions that no longer mount
- Recover from USB drives, SD cards, external HDDs, and SSDs
- Rebuild broken or wiped-out partition tables
You also get a signature-based file carving engine, so even if the file system is trashed, DMDE will try to recover files based on signatures (known headers and footers).
DMDE can also be trained to recognize unfamiliar file types by providing it with sample files. This lets users add custom file signatures for formats not included by default. It’s not something most home users will ever need to do, but still a handy option to have.
Partition Recovery & Disk Tools
DMDE can also help when the entire partition structure is gone or unreadable.
Here’s what it brings to the table:
- Detect and restore lost partitions, even after a format or a wiped partition table
- Scan full drives, not just visible volumes, to reconstruct the file system structure
- Recover boot sectors and partition headers (useful if the drive is no longer bootable)
- Fix alignment or structure errors in GPT and MBR setups
- Work with both modern and legacy partition styles, which comes in handy when cloning or restoring old systems
Once a lost partition is found, DMDE can mount it virtually inside the app, scan it, and recover files as if it were still a working volume.
DMDE also includes a built-in hex editor and boot sector viewer. These are expert-level tools that let you dig directly into the raw structure of a drive, view volume headers, and even manually repair system records (features rarely seen outside of forensic labs).
RAID Reconstructor
This one’s a big deal: DMDE includes a RAID module. If you’ve ever dealt with a failed RAID array, you know how quickly things can go from bad to worse.
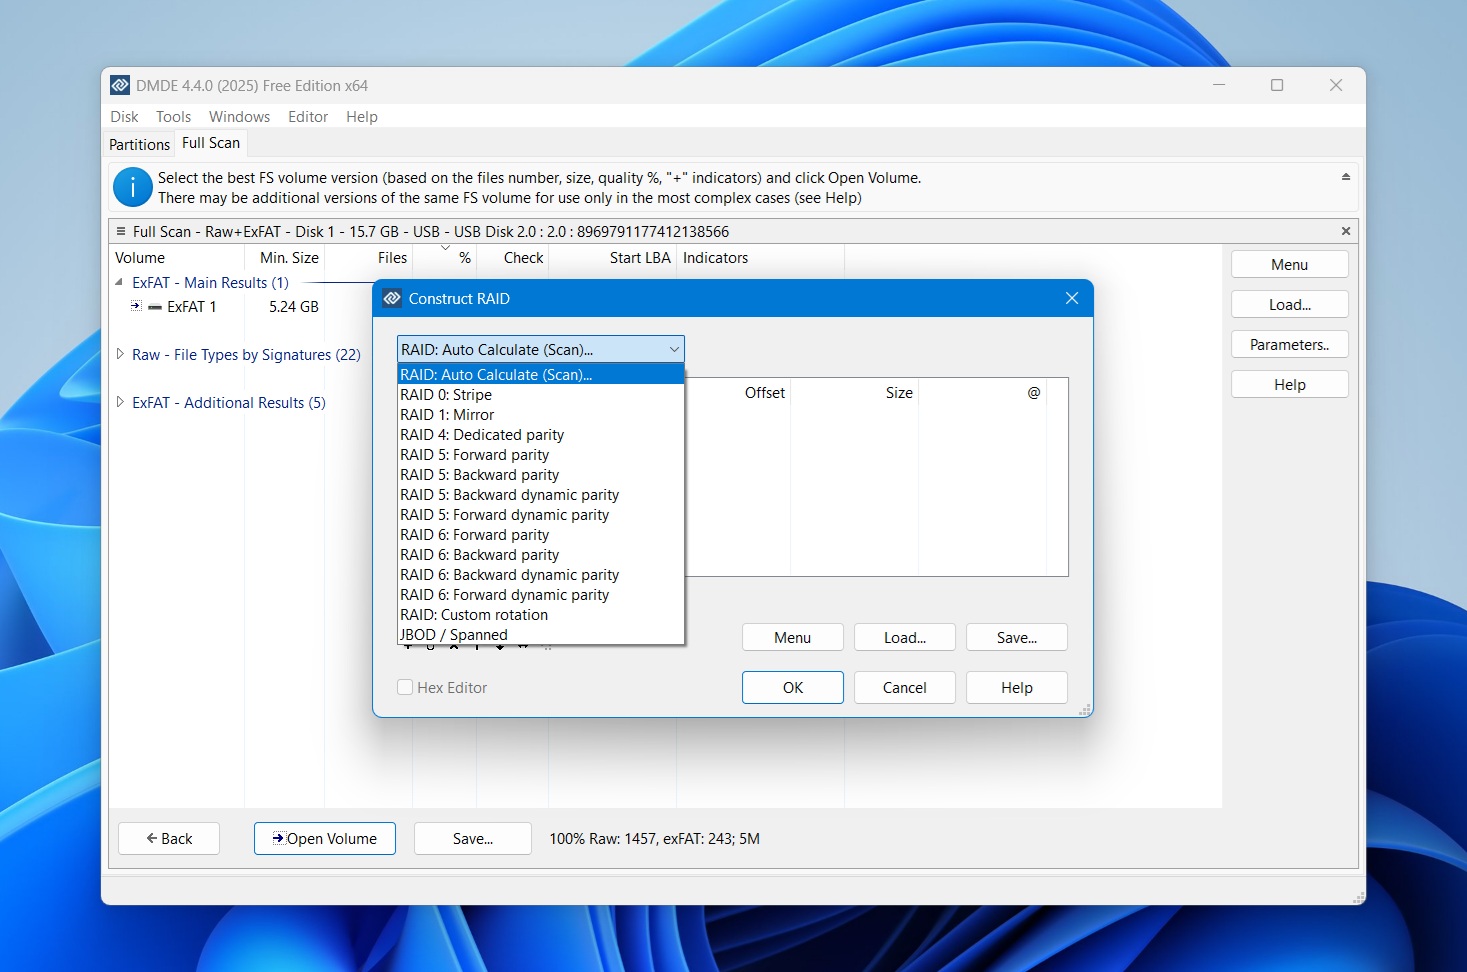
Here’s what it supports:
- RAID-0 (striping)
- RAID-1 (mirroring)
- RAID-4 / RAID-5 / RAID-6 (with or without delayed parity)
- JBOD / Spanned volumes
- Custom striping layouts
- Manual disk order configuration
- Automatic RAID parameter detection in supported setups
With this RAID module, you can build a virtual RAID from individual disks or disk images and scan it just like a normal volume. DMDE won’t risk touching the source drives (unless you tell it to).
Other Useful Features
DMDE also includes a solid lineup of tools that go beyond basic recovery, some of which you won’t find in many commercial apps.
Here’s what else it can do:
- Disk cloning – create full byte-to-byte copies or images of drives
- Write disk images back to physical disks, great for full system restore
- Handles bad sectors and I/O errors, with retry and skip logic built in
- Supports E01 images (read-only), so you can work with forensic disk formats
- Generates recovery logs and file checksums, helpful for validation
- Can resume interrupted cloning or imaging, with log-based multi-pass copying
- Customizable I/O handler scripts, useful for advanced recovery workflows
- Recovers NTFS alternate data streams, something many tools skip entirely
- Cluster map lets you track which files are using specific sectors or clusters
There’s even DMA support in the DOS version, which helps with performance when running from a bootable USB or CD on older systems.
And as you can see, there’s a lot it can do. While 99% of these extras will be completely unnecessary for a regular home user, it’s still a major plus in our book.
UI & Design
Here’s the honest truth: for all the power packed into DMDE, the user interface feels like it’s stuck in another era. The layout is functional, maybe, but it leans heavily into a technical workflow.
You won’t find dashboards, drag-and-drop recovery, or animated progress bars here. Instead, you get dense menus, dropdowns with dozens of options, and a lot of trial-and-error if you’re new to data recovery.
Navigation through the scan results can also be a chore. But we’ll talk more about that a bit later. For now, we’ll just say this: the fact that there are so many How do I use DMDE? threads online is not a coincidence.
Evaluation Methodology
For this DMDE data recovery software review, we used the same standardized test environment we’ve relied on in all our recent evaluations. Same types of drives, same mixed file set, and the same real-world data loss scenarios.
The goal was to test DMDE under consistent conditions, so we could fairly measure its recovery capabilities against other tools we’ve reviewed.
To properly evaluate DMDE, we ran it through three recovery cases:
- 1 TB Seagate Barracuda HDD (NTFS) preloaded with ~1,500 files across multiple folders. We then deleted all files and emptied the Recycle Bin.
- 64 GB Samsung EVO Plus microSD card deliberately corrupted using a partitioning tool until it showed up as RAW in Windows.
- 16 GB SanDisk Ultra USB 3.0 flash drive, quick-formatted to exFAT (a common accidental format scenario).
All three drives were loaded with the same test dataset: a realistic blend of file types we all regularly use – photos, videos, documents, archives, audio files.
File types in the dataset:
- Photos: JPG, PNG, Canon CR2/CR3, Nikon NEF
- Videos: MP4 (H.264/H.265), MOV, AVI, some action‑cam formats
- Documents: DOC/DOCX, PDF, XLSX, TXT
- Audio: MP3, WAV, FLAC
- Archives & misc: ZIP, RAR, EXE installers
However, as with most tools we test, recovery success or failure isn’t the only metric we use to assign a final score. Recovery rate is important, but it doesn’t tell the whole story.
We evaluated DMDE across these categories:
| Metric | What We Measured |
| Recovery success rate | % of files recovered (and whether they opened correctly after recovery) |
| Scan speed | How long it took to complete scans |
| Ease of use | Workflow clarity, interface responsiveness, and how easily we got from scan to save |
| Value for money | Free vs. paid functionality, and what you actually get for the license price |
Usage & Testing Results
Before we reveal our test results and final score, let’s quickly walk through what it’s actually like to use DMDE. From setup to scanning, here’s what a typical recovery session looks like:
Step 1: Download the Right Version
As mentioned earlier, DMDE is available for multiple platforms including Windows, macOS, and Linux.
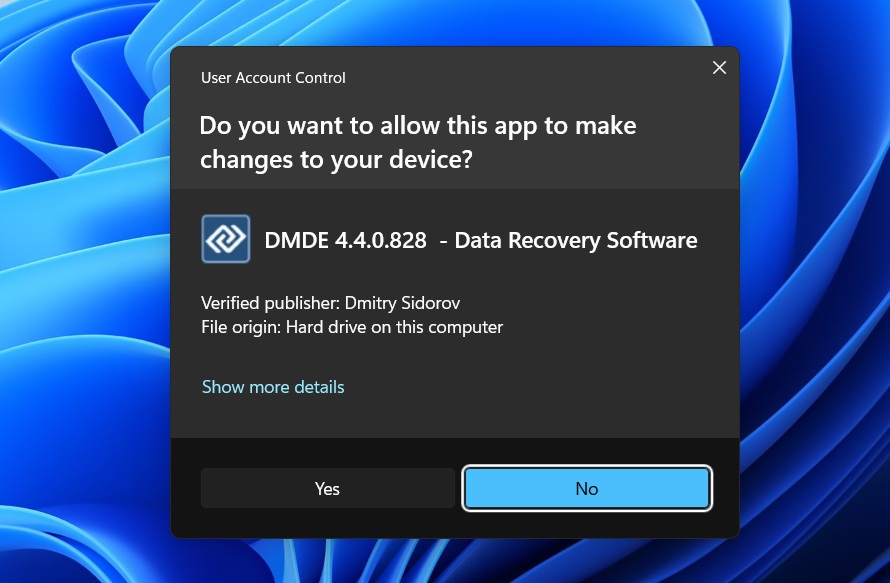
We tested it on Windows 11 (Build 26100.7171). The Windows version comes as a portable ZIP archive, so no installation necessary. Just extract the archive and double-click dmde.exe.
You’ll immediately be greeted with a User Account Control prompt confirming the publisher. Click Yes to launch the tool.
Step 2: Launch and Choose a Device
Once launched, DMDE opens to a raw list of detected drives and partitions. You won’t see friendly drive letters like “C:” or labels like “My Passport”.
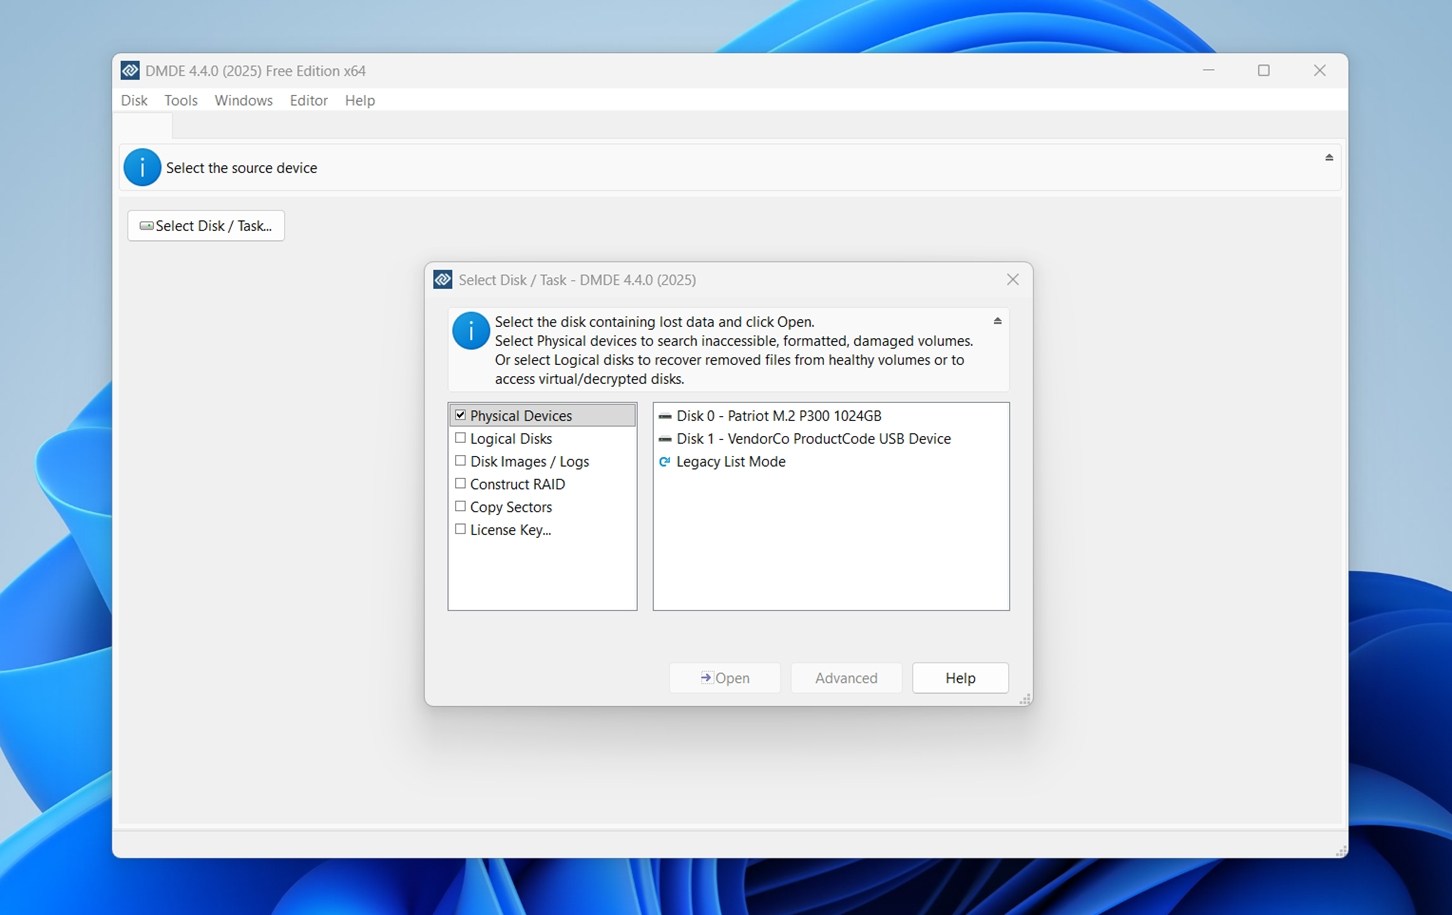
You’ll see a list divided into categories:
- Physical Devices – entire drives like SSDs, HDDs, or flash drives
- Logical Disks – volumes and partitions currently mounted
- Disk Images / Logs – if you’re working from an image backup
- RAID / Copy Sectors – for advanced users and forensic work
For most data loss situations, like accidental deletion or formatting, you’ll want to select the Physical Devices option. Then pick the relevant drive from the list (in our example: Disk 1for the USB device).
Once selected, hit Open to proceed to the partition or volume selection phase. If your device doesn’t show up here, make sure it’s properly connected and powered, or try running DMDE as administrator.
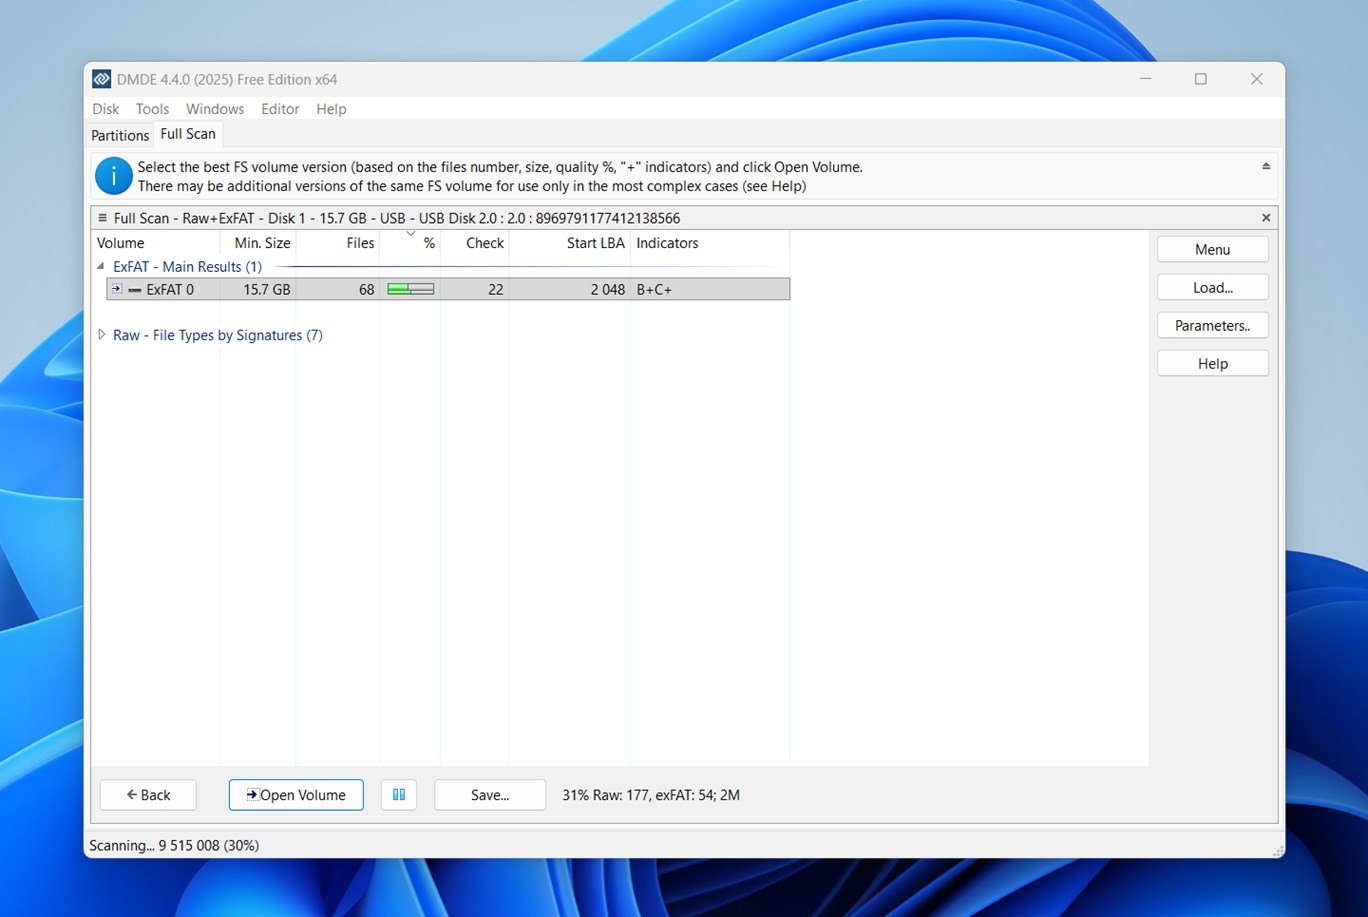
Step 3: Scan the Disk or Partition
Click “Full Scan” to begin. You’ll get a bunch of optional parameters, but most users can leave them as-is. DMDE will then start scanning for recoverable partitions and file structures.
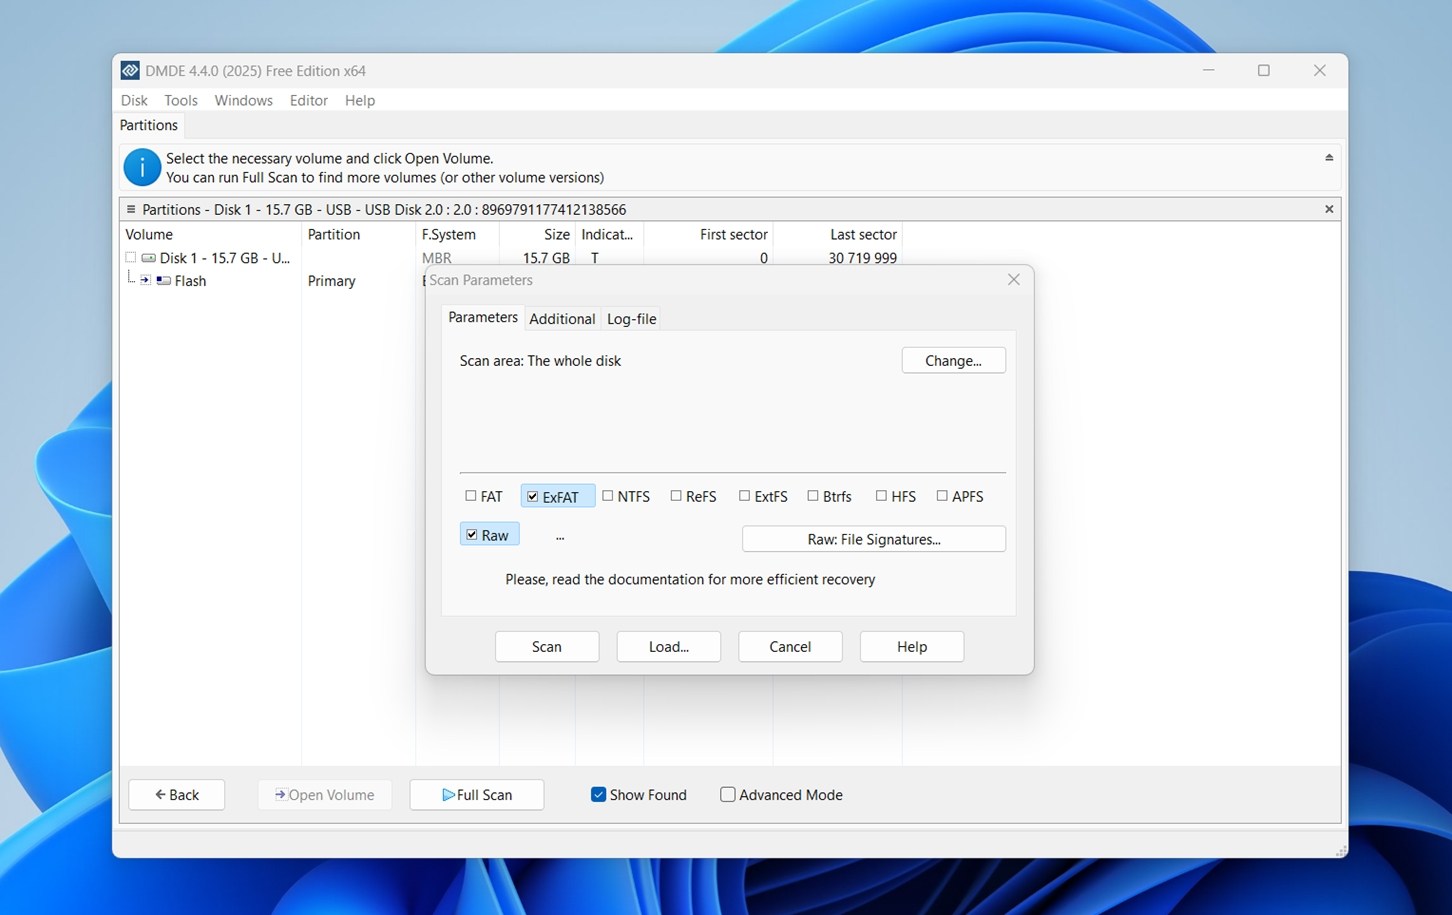
Here, you can also click the “Raw: File Signatures” button to manage the list of file types DMDE will look for. That opens the file signature manager window.
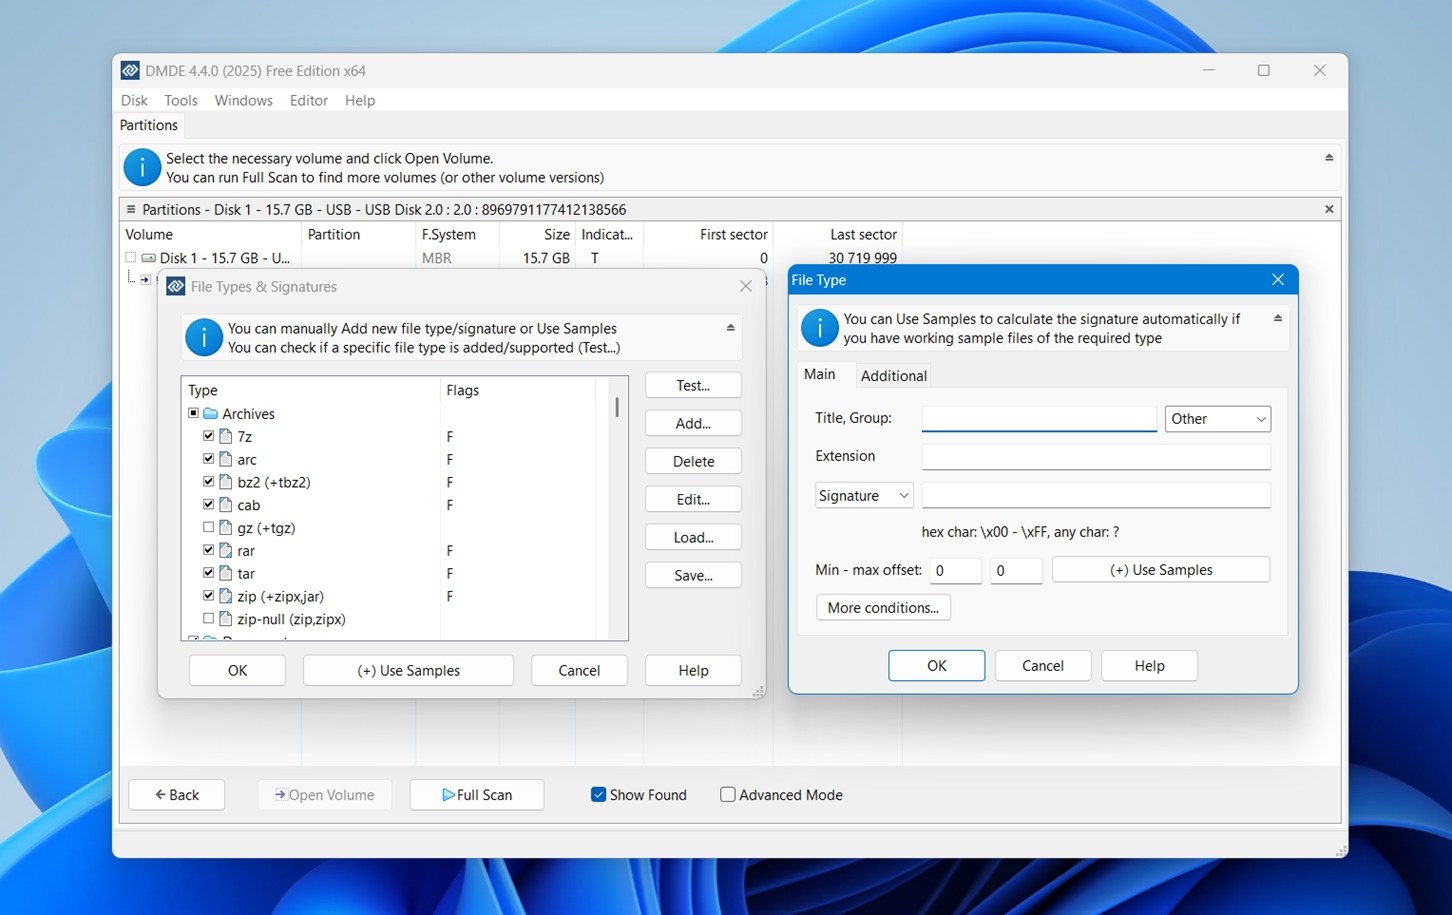
You can:
- Enable or disable specific formats (like JPEG, ZIP, MOV, DOCX).
- Use the Add… button to use the Samples option to auto-generate a new signature using a working example file.
Step 4: Review and Recover
Once the scan is done, DMDE will list any found partitions and file trees. This is where things get a little tricky: results are grouped into Main Results, Raw File Types, and Other Results, and it’s not always obvious where your files ended up.

You’ll need to dig into folders, preview what you can (limited format support), and manually select what to recover. This is where less tech-savvy users may start to feel overwhelmed. Navigating this list isn’t smooth for someone who’s never worked with recovery tools before. There’s no guided view or automatic sorting by content relevance, just the raw folder structure and file types. You’re left to manually explore here.
And when it comes to previews, DMDE adds another hurdle: it makes you double-click to preview files, which adds friction if you’re trying to quickly skim through hundreds of items. And even then, preview support is limited. RAW images from DSLR cameras (Canon, Nikon, Sony) don’t show up at all. If you’re restoring from a corrupted SD card or an old shoot, this makes selecting the right photos a chore.

On top of that, there’s no quick filter or tagging system to flag the files you care about. It all comes down to checkbox selection.
Once you’ve selected all the files or folders you care about:
- Right-click on any one of them and choose Recover, or
- Use the shortcut Ctrl+U to bring up the recovery dialog instantly.
From here, the same recovery window appears (destination path, file category options, etc.). This is your final stop before pulling your data out.
As you see, DMDE isn’t the most comfortable tool out there, and that alone is enough to spook a lot of potential users. Between the dated UI, clunky navigation, and lack of convenience features, it’s easy to feel overwhelmed if you’re not already familiar with how file systems work.
Recovery Performance
But let’s get to the interesting part: how did it fare in our tests? Time to talk results. We ran DMDE through the same three scenarios we use in all of our reviews: deleted files, a quick‑formatted storage, and a fully corrupted RAW drive.
Here’s how it performed:
| Scenario | Recovery success rate* | Scan time | Notes |
| 1 TB Seagate Barracuda HDD (deleted files, NTFS) | ~90-93% of files recovered and opened | ~75 minutes | NTFS is one of DMDE’s strongest file systems. Most documents (DOCX, XLSX, PDF), images (JPG, PNG), and smaller media files came back with original filenames and metadata. Folder structure was mostly intact. RAW formats were less inconsistent, but expected. |
| 16 GB SanDisk Ultra USB (quick format to exFAT) | ~65-72% usable files | ~28 minutes | DMDE leaned heavily on signature scanning here, since exFAT structures were wiped. JPG recovery was solid. RAW photos (CR2/CR3, NEF) were rarely usable, and DMDE cannot preview RAW formats at all. A few MOV clips recovered and played, but MP4 and action‑cam formats (GPR, INSV) were hit‑or‑miss. File names and folders were mostly gone. |
| 64 GB Samsung EVO Plus microSD (forced RAW, no file system) | ~60% usable files | ~12 minutes | DMDE found fragments of multiple “Recognized Partitions,” but results were scattered. Documents and JPGs were recoverable. Videos were mostly incomplete. All files recovered via signature scan had generic names, sorted into “Raw File Types.” A workable result for photos and documents, but not for large media files. |
Not bad at all, especially considering DMDE’s age. Like most recovery tools, DMDE performs best in the simplest scenario: recently deleted files on a healthy drive. Here, it sits comfortably in the same tier as much more polished (and more expensive) products.
But things shift as the situation becomes more complex. Just like with other recovery tools, formats or RAW states force DMDE into file signature carving territory, and that’s where its limited built-in signature library starts to hold it back. There’s no built-in support for a lot of modern multimedia file types like CRW, MRW, or 360° MP4s, which are now pretty common.
You can add your own custom file signatures, and that’s huge if you know what you’re doing. But the process isn’t beginner-friendly, and it won’t help much if you’re under time pressure and just want to get your photos back without a crash course in hex editing.
So while DMDE doesn’t fall flat, it’s clearly not built with media-heavy workflows in mind. For photographers, videographers, or anyone dealing with large sets of raw files, something like Disk Drill or R-Studio will likely perform better straight out of the box.

In terms of speed, DMDE did pretty well. On the 16 GB USB drive, the full scan wrapped up in just 10 minutes and 49 seconds, which puts it on the faster end of tools we’ve tested. That’s close to what we saw with DiskGenius in a similar scenario. To put it in perspective, we’ve run the same test with other recovery tools that took twice as long to complete, on identical hardware and conditions.
Value Breakdown by License Type
DMDE offers some of the most budget-friendly licensing options we’ve seen in professional-grade recovery tools, and it’s hard not to appreciate how much value is packed in for the cost.
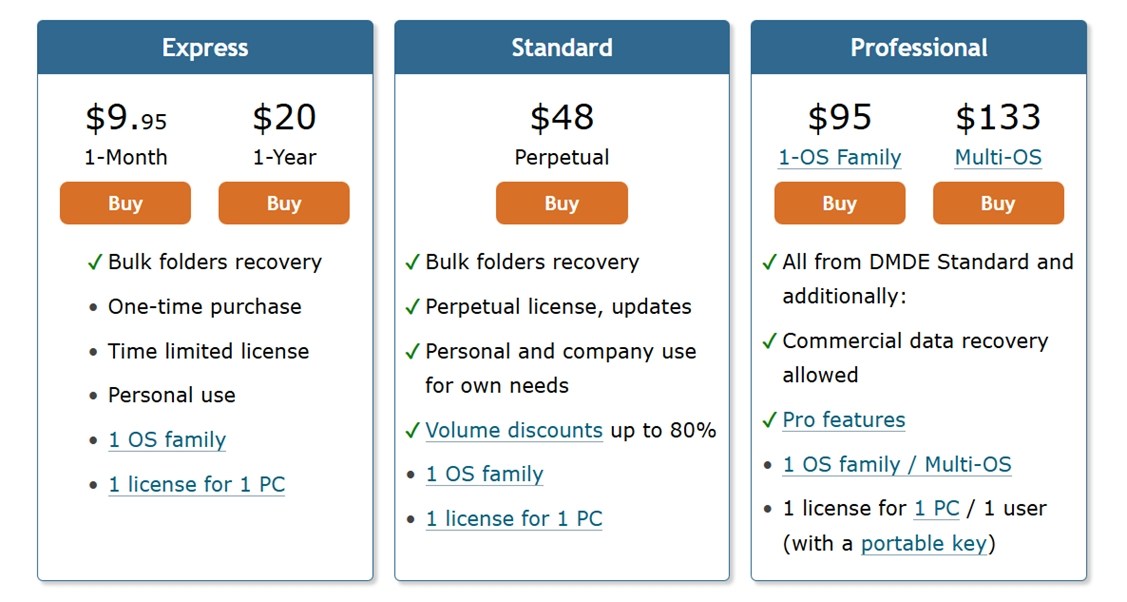
- Express licenses start at just $9.95/month or $20/year, which is perfect for one-time or occasional personal use (when all you need is to recover a batch of deleted folders).
- The Standard edition is a $48 perpetual license with free updates. It’s suitable for both individuals and businesses (for internal use only).
- Professional tiers – $95 for 1-OS Family, $133 for Multi-OS – unlock features for commercial data recovery. That includes portable key support and “pro” functions like scripting, RAID tools, and more.
Compared to tools in the same tier (like R-Studio or UFS Explorer), DMDE delivers serious bang for your buck (if you’re not turned off by its interface). While it lacks polish and ease of use, its core engine is strong, and the licensing structure is refreshingly simple.
As to the Free Edition DMDE – you can explore the entire directory tree of recovered data and restore up to 4,000 files per directory request. There’s no limit on how many of these requests you can make. That means even without a paid license, you’re still able to pull back a meaningful amount of data.
Comparison with Competitors
Not a bad value, but as always, let’s stack DMDE side by side with a few of its closest competitors and see how it compares in a real-world context. Below is a quick comparison between DMDE, Disk Drill and R‑Studio.
| Tool | Free Version | Price | File System Support | UI / Design | Speed (Typical Scan) | Features |
| DMDE | 4,000 files/session (no limit on requests) | $48–$133 (lifetime) | FAT32, exFAT, NTFS/NTFS5, ReFS, HFS/HFS+, APFS, ext2/3/4, Btrfs | Technical, old‑school, utilitarian | Fast | RAID constructor, disk editor, hex view, custom signatures, portable mode |
| Disk Drill | 100 MB (Windows version) | $89 (lifetime for Windows + Mac) | FAT32, exFAT, NTFS, APFS/HFS+, EXT4, ReFS | Polished, modern, beginner‑friendly | Fast | File previews, S.M.A.R.T. monitoring, disk imaging, data protection, cleanup tools, Advanced Camera Recovery module |
| R‑Studio | Files under 256 KB (demo) | Starts at ~$64 per OS license | NTFS, FAT12/16/32, exFAT, ReFS, HFS/HFS+, APFS, ext2/3/4, many Linux FS | Complex, data‑heavy interface | Moderate | RAID reconstruction, network recovery, forensic tools, hex editor, support for damaged/raw drives |
DMDE is the clear winner if you’re technical and want low-cost access to deep disk features. Its free version is also surprisingly generous. Especially when you stack it next to R-Studio, where the free version limits you to recovering files under 256 KB (not exactly practical for most real-world scenarios). Unless you’re pulling log files or tiny documents, you’ll need to buy a license early on just to test anything meaningful. And in terms of interface, R-Studio doesn’t offer much comfort either. It’s still clunky and built more for forensic workflows than everyday recovery jobs. So in terms of usability, it sits close to DMDE.
If UI matters to you, Disk Drill is the clear standout. It doesn’t force you to wrestle with the interface, and its layout is clean and modern. And when you consider that its recovery engine often outperforms DMDE (especially in our photo and video tests) Disk Drill starts looking like the better pick for users who want both power and usability.
So the choice really depends on what you prioritize:
- DMDE if you’re after good value and you don’t mind a steep learning curve.
- Disk Drill if you want a smoother ride without giving up recovery power.
- R-Studio if you’re in a niche recovery job or forensic-grade scanning and need deep control over everything.
Customer Reviews & Trust
As always, we also factor in what real users say about the software. As of writing, there isn’t a huge volume of DMDE reviews on major platforms like Trustpilot, G2, or Reddit compared to more mainstream tools like Disk Drill or R-Studio.
- Softpedia shows a solid rating of 4.1/5 from over 30 user reviews, with 8,741 downloads counted at the time of writing.
- CNET also hosts a copy, where the user rating stands at a perfect 5/5 (based on fewer votes, but still).
We also dug into Reddit, where feedback tends to echo a consistent theme: DMDE is solid, affordable, but definitely not built for everyone. The interface and learning curve pop up often as sticking points.
Here are some comments that capture the general sentiment:
“I’ve used it a lot and can agree it’s not super intuitive, but it’s so much cheaper than the next best alternative.”
u/Trashrascall
“I’m not a DMDE fan. It’s largely competent, but R-Studio and UFS Explorer are better. GetDataBack is better with partially overwritten NTFS, as well as picking up after chkdsk.”
u/Zorb750
Is DMDE Safe?
We also came across a few questions about DMDE’s safety, understandably, since lesser-known tools often raise red flags for cautious users.
Just to be sure, we ran DMDE through our usual checks before and after testing. The installer was clean, and our system showed no suspicious behavior or lingering background processes after recovery tasks. We also scanned with multiple antivirus tools and found no signs of malware/spyware with the app.
So from a security standpoint, DMDE is safe to use.
Verdict
After going through all our tests, here’s how DMDE ranked in our hands-on evaluation:
| Metric | Score | Notes |
| Recovery success rate | 7 / 10 | Very strong recovery engine, especially with NTFS and FAT volumes. It reliably restored documents, jpg photos. Less consistent with complex video and RAW files. |
| Scan speed | 8 / 10 | Scanned a 16 GB USB drive in just over 10 minutes – respectable speed for a tool with low overhead. |
| Ease of use | 5 / 10 | Designed for technical users. The UI feels dated, and there’s a learning curve. Not ideal for home users. |
| Value for money | 8 / 10 | The pricing is hard to beat: no subscriptions, lifetime licensing, and even the free edition lets you recover up to 4,000 files per session. |
🌟 Overall Score: 7 / 10
DMDE isn’t trying to win you over with slick design or beginner-friendly menus, but under the hood, it’s a beast. The recovery engine is reliable, the price is honest, and the features like custom signature scanning, disk editing, and RAID assembly are pro-level.
It’s a tool for people who know what they’re doing (or are willing to learn). If you’ve worked with file systems before, you’ll appreciate the level of control DMDE gives you. If not, you may find it overwhelming compared to something like Disk Drill or Stellar Data Recovery.
DMDE is best if:
- You want deep recovery tools
- You’re comfortable with hex views, partition tables, and manual rebuilds
- You want a tool that works across Windows, Linux, and macOS without price gouging
But if user experience, drag-and-drop simplicity, or video/photo previews are a priority, there are smoother rides out there. Still, for the price DMDE is a gem.


")