
Tenorshare 4DDiG Data Recovery proudly boasts 16 years of data recovery experience and a 99% recovery rate on its official page. Impressive numbers, but we wanted to see how true they feel in real use. In this Tenorshare 4ddig review, our team tested the software on real equipment and actual data loss cases. If you want to find out how well it holds up when files vanish for real, here’s what we discovered.
Quick Verdict
If you’re looking for the quick answer, here’s our verdict: Tenorshare 4DDiG is dependable for everyday recovery jobs, but it doesn’t nail everything.
🏆 Best for: Windows and macOS users dealing with accidental deletions, formatted drives, or memory cards, especially if you want a clean interface and photo/video repair included.
It handled simple recovery cases well in our testing. Deleted files, basic photo rescues – no problem. The UI is simple, and the built-in repair tool is a useful bonus. The lifetime license is affordable, and it supports a wide range of formats and devices.
That said, recovery from corrupted disk wasn’t flawless. Deep scans are slower than some alternatives. And some people have reported issues with refund policies or questionable preview behavior, so the trust factor isn’t bulletproof.
Pros
- Simple and beginner-friendly interface
- Solid results with deleted files
- Supports photo/video repair
- Broad file system support
- Lifetime license available
- Slow scan speed on large or damaged drives
- Data limit before upgrade required
- File names often missing
- Mixed reviews on customer support / refund experience
- Limited preview feature
Overview
As always, we’ll start our review with a bit of background, because where a tool comes from says a lot about how much you can trust it.
Tenorshare 4DDiG was created by Tenorshare, a company that’s been around since 2007. If you’ve ever looked into phone repair tools, data transfer utilities, or Windows system fixers, you’ve probably come across their name. Over the years, they’ve built up a pretty big user base – they claim over 142 million users across all their products.
4DDiG has become one of their biggest tools, and it shows. Updates come in regularly. The current version (as of 2025) is in the 10.x range. It’s clear they’re still investing in the platform.
On the compatibility side, 4DDiG runs on both Windows and macOS, including the latest versions like Windows 11 and macOS Tahoe (26). The interface is nearly identical on both platforms, though the file system support shift.
File System Support
When it comes to file system support, 4DDiG covers most of what you’d expect.
- If you’re on Windows, you’ll be working with NTFS, FAT32, exFAT, and even FAT16. These cover pretty much all internal drives, USB sticks, SD cards, and camera media used by Windows users.
- For Mac, 4DDiG handles APFSand HFS+, which means it can recover from most internal and external drives connected to a Mac – even if they were encrypted (as long as you know the password, of course).
We were pleasantly surprised to find that 4DDiG on Windows can also detect and scan ext3/ext4 Linux partitions, though in a read-only way. You won’t get native support for Linux systems, but if you’ve got a Linux drive plugged into your Windows machine, there’s a good chance it’ll at least see it and let you attempt recovery.
File Type Support
If you’ve looked at 4DDiG’s website, you’ve probably seen the big, shiny claim: “Supports 2000+ file types and 2000+ storage devices.”

Sounds great. But let’s be real, most recovery software pages throw around big numbers like that, and a lot of it’s marketing. What they don’t tell you is how well the recovery engine actually performs or how deep its signature support goes.
We’ll put those claims to the test a bit later in this article.
Features
4DDiG comes with a solid set of features. Nothing flashy, but enough to cover real-world recovery needs.
You get both Quick and Deep Scan modes, but they aren’t split in the UI. When you click “Scan,” it starts with a quick pass, then moves right into a deep scan without asking. That works fine for most people, though some pros might prefer more manual control.
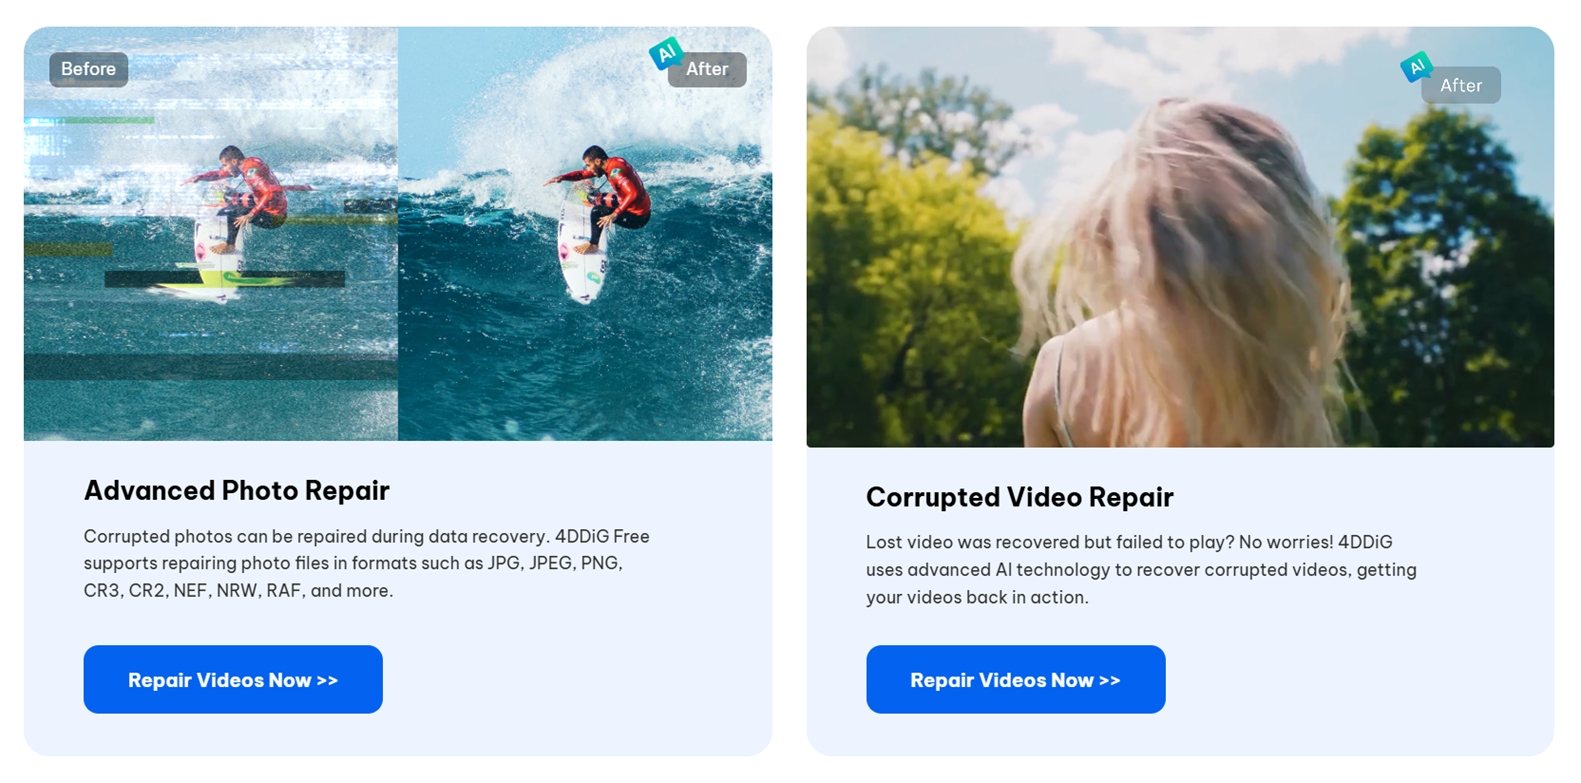
There’s a built-in photo and video repair tool. If a recovered file won’t open, you can try repairing it on the spot. It doesn’t work miracles, but we did see it fix a couple of broken JPEGs during testing, enough to view them again.
No extras like disk imaging, S.M.A.R.T. monitoring, recovery scheduling, or RAID utilities here. Those are features we usually see in more advanced or technician-level software. So if you’re shopping for a full suite with backup tools or deep hardware diagnostics, this isn’t that.
User Interface
The UI tells you right away who this tool is made for – home users who’ve probably never touched recovery software before.
When you first open 4DDiG, it literally points out where to click and what to do. There’s a short onboarding overlay that walks you through the process step-by-step: pick a drive, hit scan, preview files, recover. No dense menus here.

The layout is clean and calm. Drives and common locations (like Desktop or Recycle Bin) are shown with big icons. Scan results load in real-time, and everything is grouped in plain English: “Deleted Files,” “Lost Location,” “File Type.”
How We Evaluated 4DDiG
We used a similar setup here as we did for our previous software tests: consistent devices, same file sets, and scenarios. The goal was to mimic what real people deal with when files disappear: accidental deletions, reformatted drives, and corrupted cards.
To make this Tenorshare 4DDiG data recovery review meaningful, we ran it through a few test cases, each designed to hit a different difficulty level.
Test hardware included:
- 1 TB Seagate Barracuda HDD – filled with around 1500 mixed files. We deleted all of them and emptied the Recycle Bin.
- 16 GB SanDisk Ultra USB 3.0 Flash Drive– manually corrupted using a partition editor so it became RAW in Disk Management.
- 64 GB Samsung EVO Plus microSD card – quick-formatted with NTFS to simulate a classic “I formatted the wrong drive” moment.
We copied the same dataset to each device beforehand, a mix of common file types totaling around 60 GB. Then we wiped, formatted, or corrupted them depending on the test.
Here’s a quick look at some of the file types included in our dataset:
- Photos: JPG, PNG, Canon CR2, Nikon NEF
- Videos: MP4 (H.264/H.265), MOV, AVI
- Documents: DOCX, PDF, XLSX, TXT
- Audio: MP3, WAV, FLAC
- Archives & misc: ZIP, RAR, and a few installer EXEs
These three recovery scenarios gave us a range from straightforward undeletes to full-blown file system damage, which helped us see where 4DDiG performs best and where it starts to struggle.
But recovery success alone wasn’t the only thing we looked at. A solid tool should also be fast, easy to use, and priced fairly. So, here’s how we scored it:
| Metric | What We Measured |
| Recovery success rate | % of files that came back usable and complete |
| Scan speed | Time to complete scans across drives of different sizes |
| Ease of use | Setup, workflow clarity, and UI responsiveness |
| Value for money | Free vs paid limits and overall return per license |
We’ll break down the results of each test case in the later section.
Product Workflow
Before we talk about performance, let’s walk through what using 4DDiG actually feels like – from download to recovery.
1. Download & Install
You can grab Tenorshare 4DDiG from the official website – there’s a free version available for both Windows and Mac. The installer is lightweight (~105 MB) and doesn’t try to sneak in any extra software. Installation is quick, and you don’t need to create an account to start scanning.
You can download the software directly from the official website using the Free Download button.
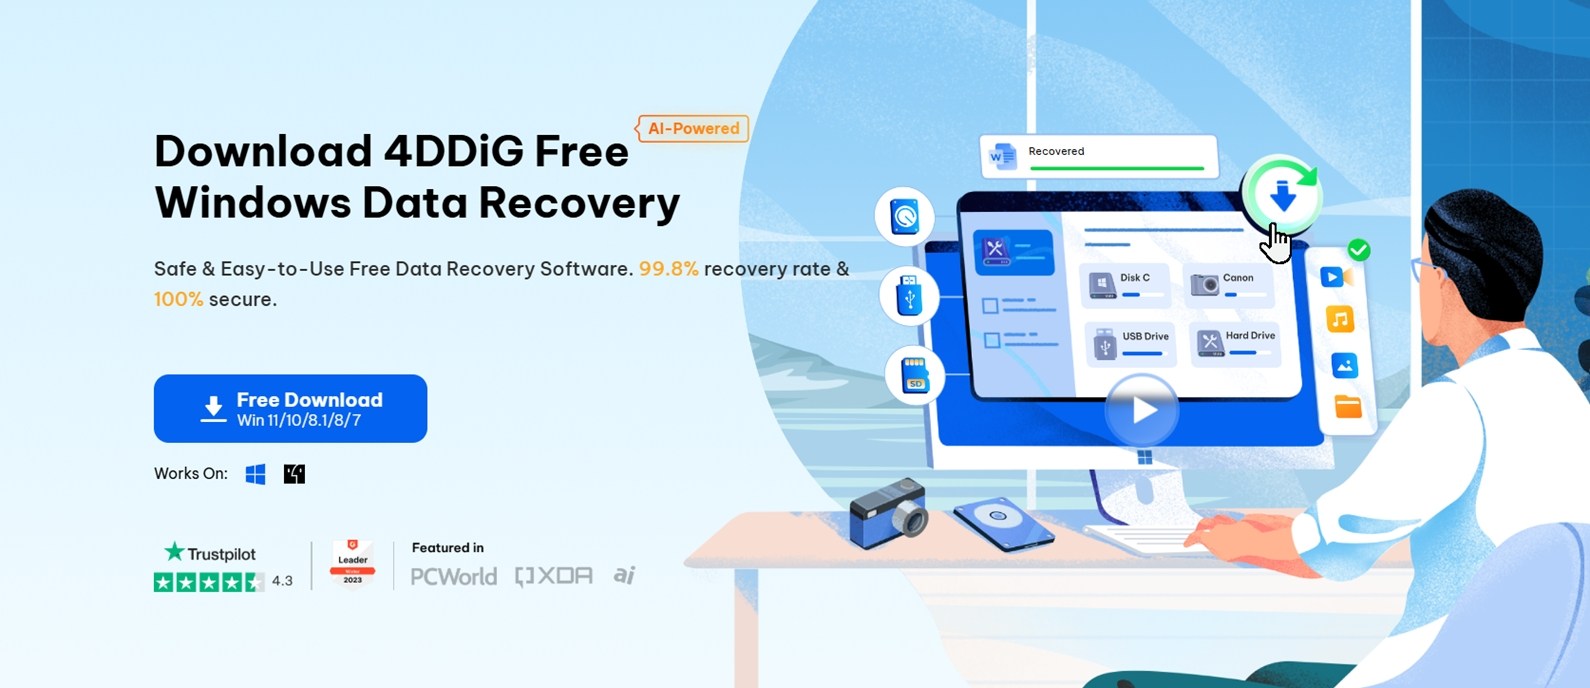
There’s a free version available for both Windows and Mac. The installer is lightweight (~105 MB) and doesn’t try to sneak in any extra software.
💡 Tip: If you’re using Windows 10 or 11, you can also install it via the Microsoft Store, which simplifies things.
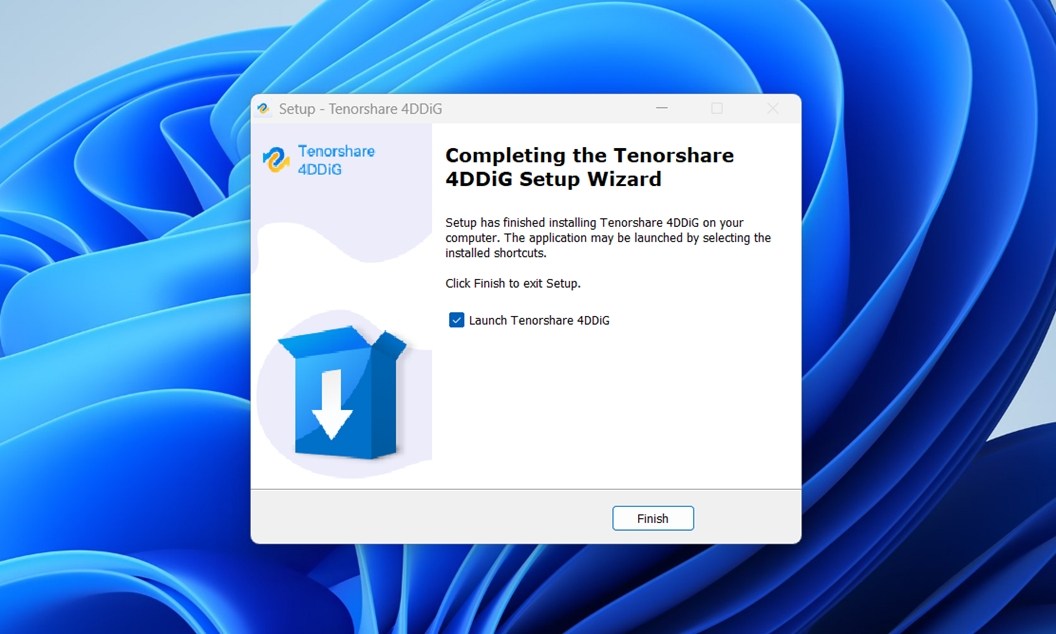
Once downloaded, installation is quick and standard. Just follow the prompts and launch the app. It’s streamlined for beginners.
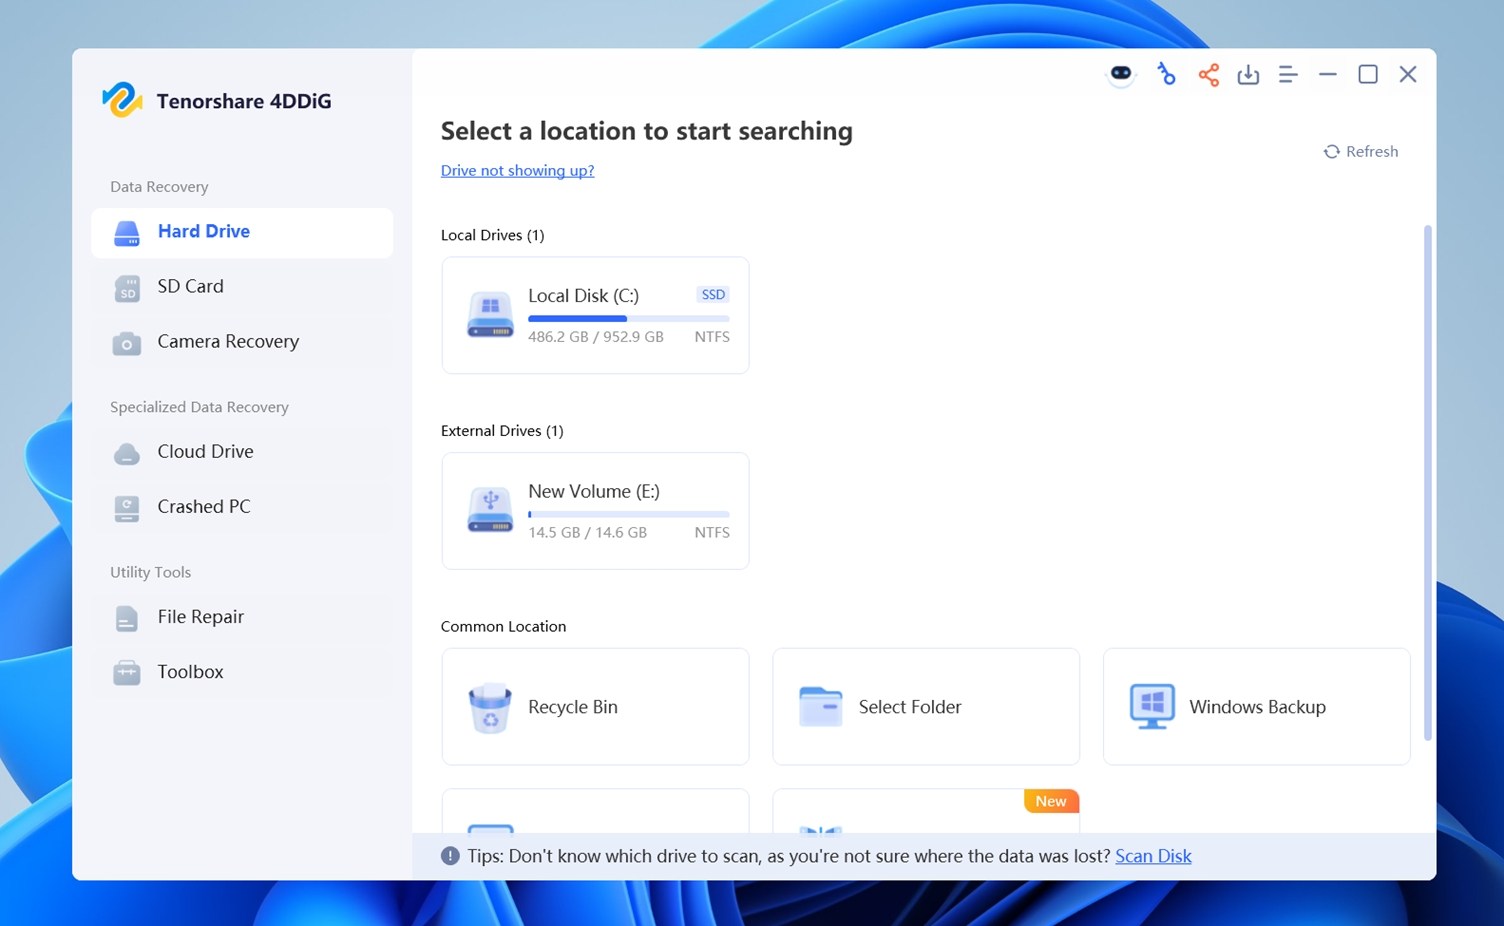
2. Launch & Select a Drive
Once you open 4DDiG, the app automatically lists all available drives and common folders, such as Desktop, Recycle Bin, and Documents.
You’ll also notice a small tip bar at the bottom of the screen, something like “Don’t keep saving new files to the drive you’re trying to recover from.” It’s a small touch, but shows that the software tries to guide beginners through the process.
It might seem obvious, but a lot of users don’t realize this: every time you save something new to the same drive, there’s a risk it’ll overwrite the deleted data you’re trying to get back.
From here, all you do is select the drive or location where your files went missing. Once you’ve picked your target, click Scan, and the recovery process begins.
3. Scan Process
After 4DDiG prompts you to choose which file types you want to recover: photos, videos, documents, audio, or all of the above. This speeds things up a bit if you’re only after specific data. Most users will want to leave everything checked, especially if they’re not sure what exactly was lost.
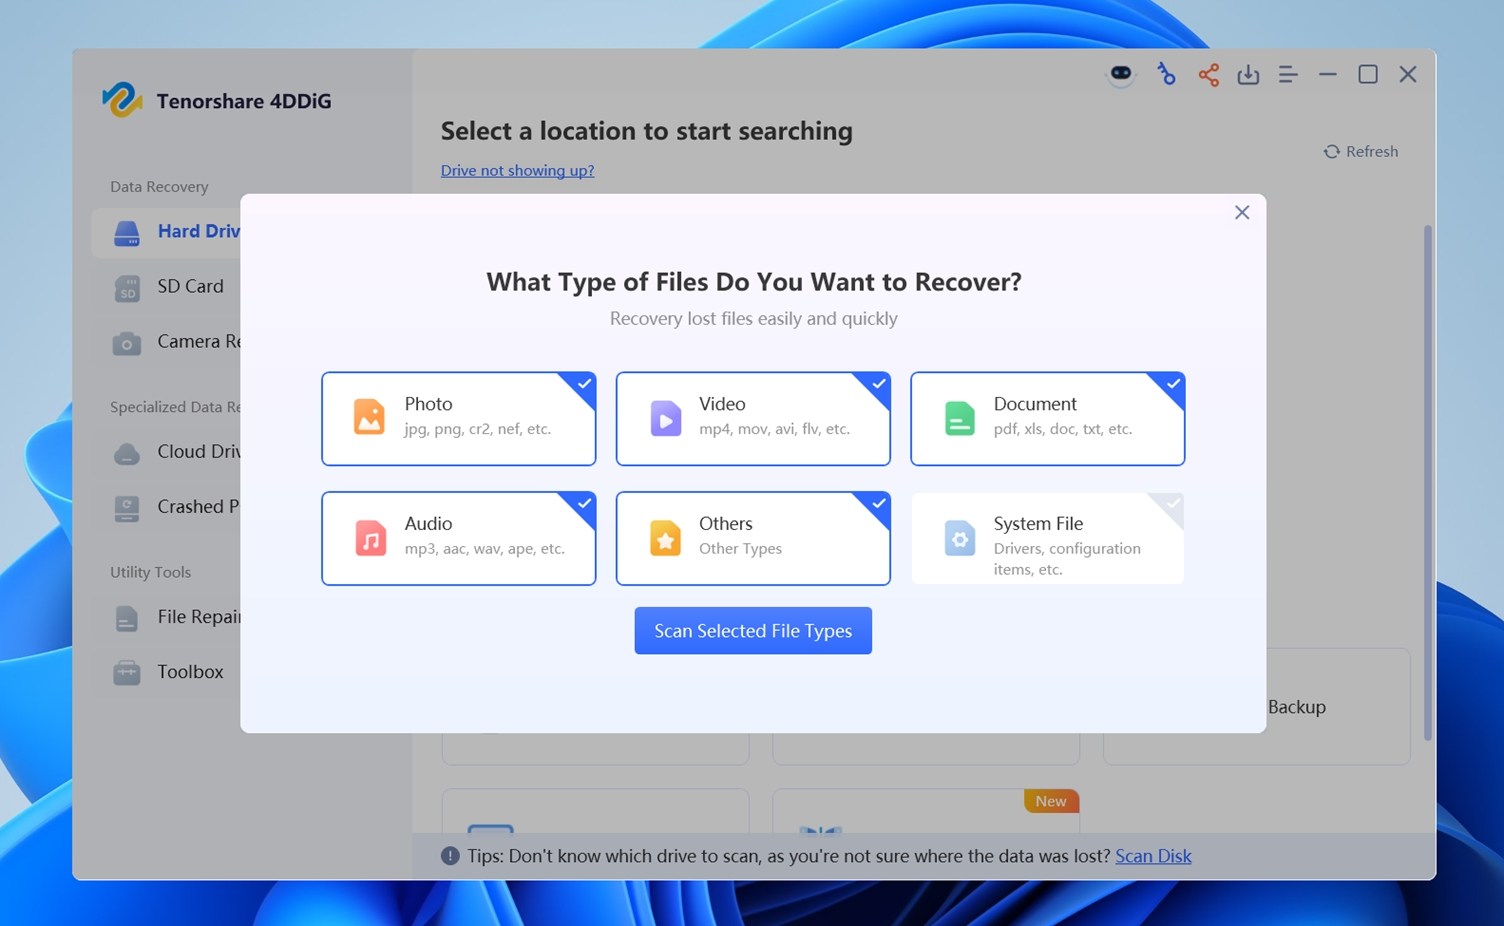
Once you’ve made your picks, just hit “Scan Selected File Types.” That’s where the real work begins.
4. Preview & Recover
As 4DDiG scans your selected drive, it neatly sorts the results into folders like Lost Files and Existing Files. This makes it easier to understand what’s been recovered versus what was still intact.
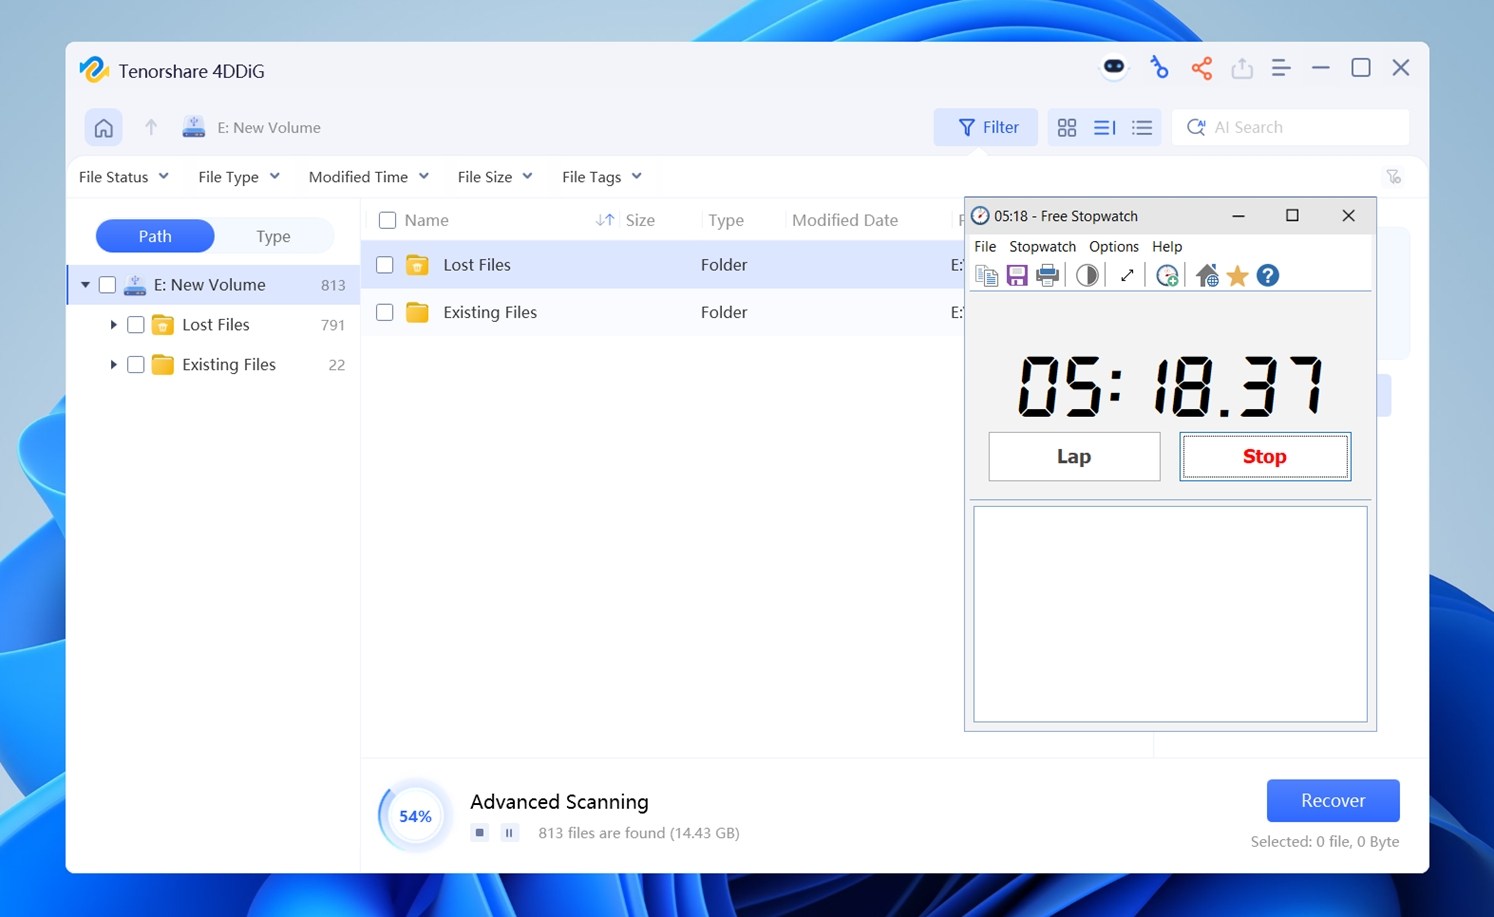
- Lost Files usually includes deleted or otherwise missing data that the scan was able to piece back together.
- Existing Files shows what’s already accessible but still included for recovery or backup purposes.
You can click on any folder or file type to preview the actual content. This is especially useful when the file names are generic or missing altogether (which happens often with lost data).
Visual previews help you identify the right files and quickly tell if a file is usable or broken. Unfortunately, this is where 4DDiG really let us down. In most cases, we were stuck staring at “Loading…” for far too long.
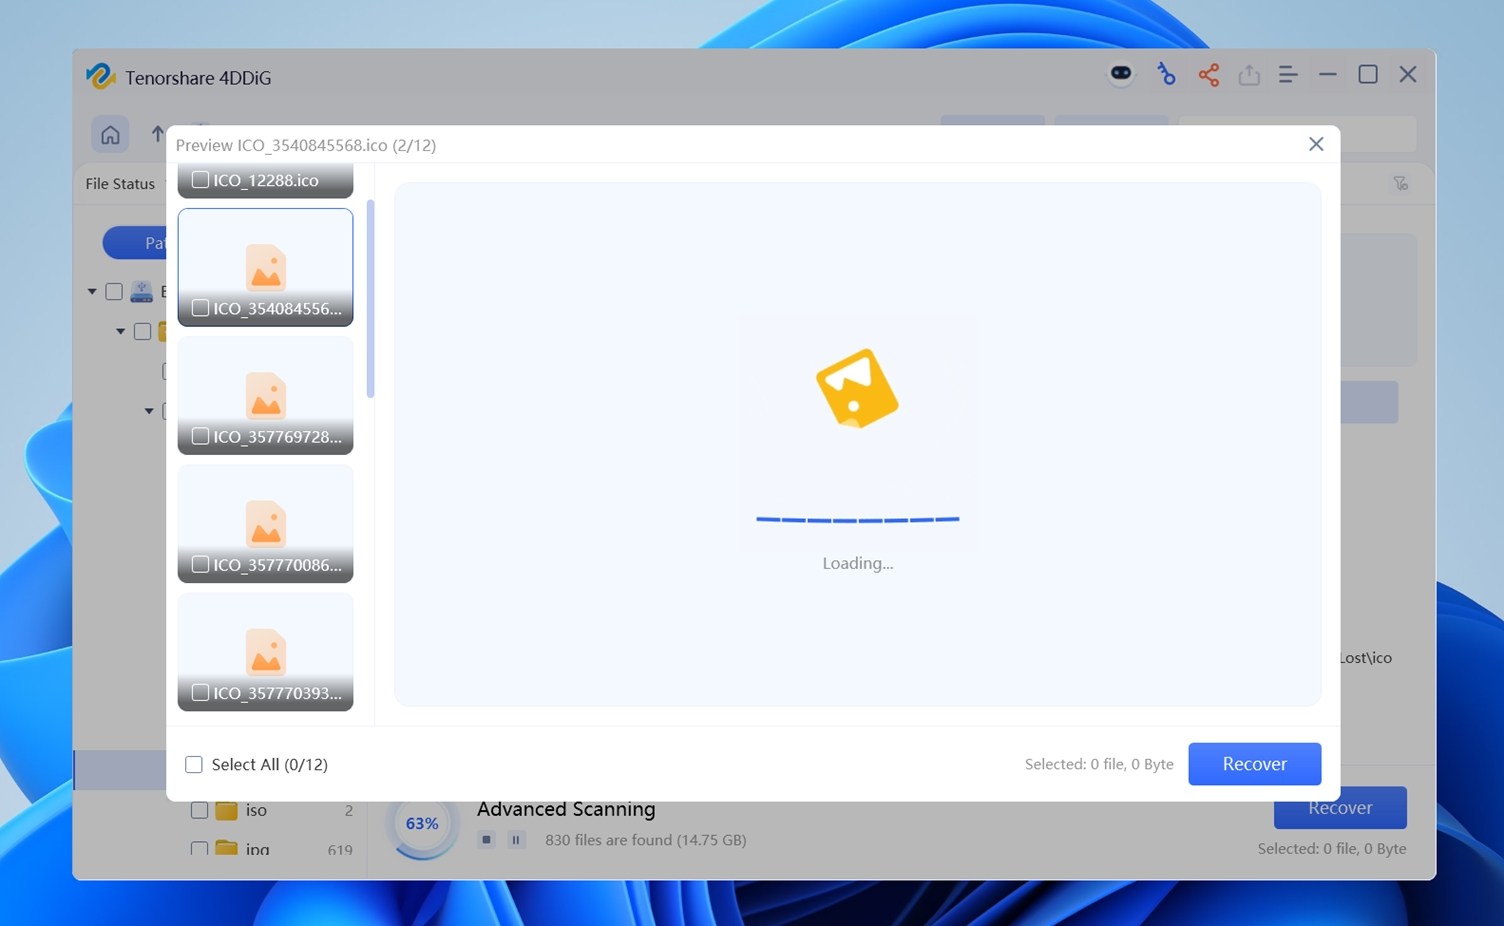
And in many cases, previews never loaded at all. This isn’t just about corrupted files (which is understandable), we ran the same recovery tests with other tools on the exact same drives, and those had no issue showing previews.
This feature seriously needs improvement. Especially since 4DDiG markets previewing as a key part of the recovery process. Not ideal when time and data are on the line.
At this stage you can:
- Use the filters at the top (File Status, File Type, Modified Time, etc.) to zero in on what you need.
- Select what you want to save, then click Recover in the bottom-right corner.
Test Results & Performance
Now let’s get into the part that matters most: recovery performance.
We ran Tenorshare 4DDiG through 3 test scenarios and here’s how it stacked up:
| Scenario | Recovery Success Rate | Scan Time | Notes |
| 1 TB WD Blue HDD (deleted files, NTFS) | ~82% | 75 min | Most common file formats like DOCX, XLSX, MP4, and JPG were recovered. Several CR2 photo files worked, but CR3 and Sigma RAW were missing. Folder structure was partially lost. |
| 64 GB Samsung EVO Plus microSD (quick format, NTFS) | ~61% | 28 min | File names were missing, folder structure unrecoverable. Some images restored but most videos and archive files were incomplete or broken. |
| 16 GB SanDisk Ultra USB (RAW, no FS) | ~58% | 24 min | Software failed to detect many signatures. Recovered files were mostly fragments with generic names. CR2s appeared but were corrupted. No CR3, no Fujifilm RAW, no RED video formats. |
Overall, Tenorshare 4DDiG delivered okay but mixed results. It recovered most common file types from our HDD test: things like Word documents, PDFs, and standard images came back intact, and even some videos were playable. But on the flash drive (which we corrupted into RAW), it struggled. The scan completed, but many files couldn’t be opened, and lots of filenames were missing. As for the microSD card that we quick-formatted in NTFS, it did better than expected, but some RAW photo formats like CR3 or Fujifilm RAW were missing entirely.
We did manage to repair a few broken JPGs using the built-in photo repair feature, which was a nice bonus.
That said, previewing files was painfully slow, and it really hurt the overall experience. As we mentioned earlier, previews often got stuck, and even when they worked, they added a ton of extra time. For example, a scan on the SD card took about 25 minutes, but going through previews easily doubled that, and not always with useful results.
While 4DDiG handles basic data loss cases, it doesn’t quite meet the mark for photographers or pros dealing with RAW formats or severely damaged drives.
Cost Value Analysis
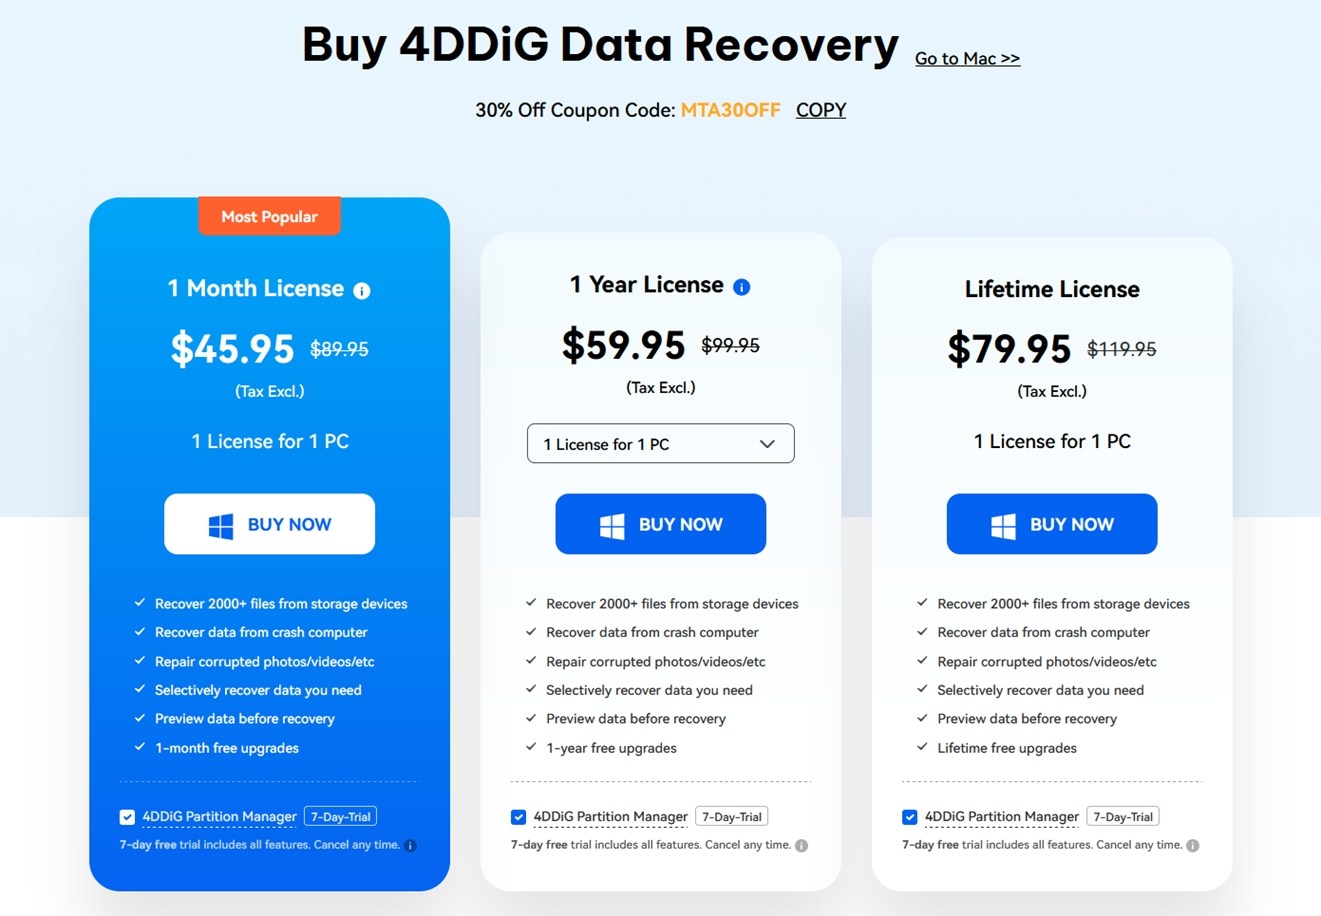
Tenorshare 4DDiG offers three pricing tiers, all limited to a single PC license.
Here’s how the cost breaks down when you compare it to actual recovery performance, in simple terms. In the best-case scenario, 4DDiG recovered around 82% of the files. That means about 49 GB of data came back.
Now let’s look at what that recovery costs you:
| Plan | Effective Price | Cost per GB Recovered |
| 1 Month | $45.95 (normally $89.95) | ~$0.94 per GB |
| 1 Year | $59.95 (normally $99.95) | ~$1.22 per GB (if only used once) |
| Lifetime | $79.95 (normally $119.95) | ~$1.63 per GB (if only used once) |
But here’s the thing: you’re not going to reuse a 1-month plan. If you plan to recover just one drive, that $45.95 cost is pretty steep for a basic job.
If you do go with 4DDiG, the lifetime plan makes the most sense. It’s cheaper than running two separate recoveries with the monthly license, and you’ll probably need it again down the line. But keep in mind – many other tools we’ve tested can pull off similar or better results for less (and with fewer headaches during preview or recovery).
When you look at the actual dollars per gigabyte recovered (and especially per usable file), it’s not the best deal unless you get the promo and plan to use it more than once.
You also get 500 MB of free recovery in the trial version, which is enough to test it out with a few photos or short videos. If your data loss is small – say, a handful of family pictures or documents – you can try it yourself and see how well it performs before paying for a full license.
4DDiG vs Competitors
Let’s stack 4DDiG next to some of its closest competitors, tools that target the same kind of user: folks who want a straightforward UI, support for common file types, and decent recovery performance without needing to be a tech wizard.
Below is a side-by-side comparison of how 4DDiG holds up against Disk Drill, EaseUS, and Recuva:
| Feature/Tool | 4DDiG | Disk Drill | EaseUS | Recuva |
| Platform Support | Windows, macOS | Windows, macOS (single license) | Windows, macOS | Windows only |
| Scan Speed | Average | Very fast | Similar to 4DDiG | Average |
| Preview Functionality | Buggy & slow | Smooth previews | Decent previews | Basic previews |
| File Repair | ✔️ JPG/MP4 repair included | ❌ Not available | ❌ Not available (in base plan) | ❌ No repair |
| Free Recovery Limit | 500 MB | 100 MB (Windows), unlimited preview (Mac) | Up to 2 GB (Windows). Mac free trial = scan/preview only | Unlimited (Windows) |
| Scan Results | ~60–80% recovery on 60 GB test | ~93% recovery (same test media) | Similar to 4DDiG on basic cases | ~60–80% on the same media |
| File System Support | NTFS, exFAT, FAT32, ext3/4, HFS+ | NTFS, FAT32, exFAT; also EXT2/3/4 (Linux), HFS+/APFS (Mac). Broadest support. | NTFS, FAT32, exFAT (Windows); HFS+, APFS (Mac). | NTFS, FAT16, FAT32, exFAT. No HFS+/APFS or ext. |
| UI / Ease of Use | Very beginner-friendly | Clean, modern, slightly richer | Also beginner-friendly | Wizard-style UI |
| Price (Lifetime) | $79.95 (normally $119.95) | $89 one-time for Pro | $149 one-time | $0 (Pro: $24.95 per year, no recovery boost) |
| Best Use Case | Home users, photo repair | General all-purpose recovery | Home users | Light use, small quick tasks |
When you place 4DDiG side-by-side with its closest rivals, there’s really only one thing that makes it stand out: the built-in photo and video repair tool. That’s a genuinely useful addition. But if we’re talking raw recovery performance, speed, UI experience, or value, there are stronger options across the board:
- Disk Drill offers much better scan performance (and finishes scans faster), plus it has a smoother interface with real-time previews that don’t lag or glitch the way 4DDiG’s often do. It also includes more tools (like disk backups, disk health monitoring, and Data Protection), much more versatile overall.
- EaseUS has comparable recovery results to 4DDiG in most standard scenarios, but edges ahead with a more polished interface and better organization during file preview. Yes, it’s more expensive, but you’re paying for a better user experience.
- Recuva, while much more limited, costs nothing – and for simple deletions on a healthy drive, it might get the job do ne just as well. It’s not as powerful, but it’s free, and that alone makes it worth trying before paying for anything else.
If you specifically need video or photo repair, 4DDiG is a solid mid-range option. But if your goal is the best recovery experience for your time and money, you can get faster scans, better results, and a smoother UI from other tools, sometimes for the same price, or even less.
Customer Reviews and Reputation
While our lab tests provide one perspective, it’s important to also consider real user experiences with Tenorshare 4DDiG. We looked at various user review platforms to gauge overall satisfaction, common praise, and common complaints about 4DDiG. Here’s what we found:
- On Trustpilot, 4DDiG has a 4.0 out of 5 TrustScore with around 240 reviews logged. Approximately 80% of reviewers gave it 5 stars, about 19% gave it 1 star, a mostly happy user base, but a notable minority of very unhappy customers.
- On G2 (business software reviews), it fares better: 4.8 out of 5 based on 129 reviews. Such a high score suggests many users (especially small-business users) find it excellent in ease of use.
- Capterra similarly shows 4.8/5 from a smaller pool (~40+ reviews).
- On tech forums and Reddit, opinions are more mixed and sometimes polarized. We encountered threads where some users call it a “lifesaver” and others label it a “scam”. Clearly, experiences differ based on outcomes.
As you can see, most reviews lean positive, especially from folks who used 4DDiG for light recovery tasks. It delivers on its promises in those cases and keeps the learning curve low, which makes it appealing to beginners.
But despite that, we’ve seen a lot of people still asking questions like “is Tenorshare 4DDiG legit?” and that usually stems from a few patterns:
- Some users expected the trial to fully recover files, but didn’t realize it only allows recovery of up to 500 MB for free. Once they hit that limit, they get a paywall. That mismatch between expectation and experience is common.
- Others reported that 4DDiG didn’t find certain files, or didn’t recover them in a usable state (like corrupted videos or documents). This isn’t unique to 4DDiG – it can happen with any recovery tool.
- A few negative reviews mentioned that support responses felt generic or slow. While this isn’t universal, poor support during stressful data loss situations can shake a user’s confidence in the brand.
Final Verdict
Okay, let’s wrap this Tenorshare 4DDiG data recovery software review with our closing thoughts after putting it through its paces.
Here’s how it stacked up:
| Metric | Score | Notes |
| Recovery success rate | 6.5/10 | Performs fine on recently deleted files and lightly formatted drives. Struggles with deeper damage or fragmented files compared to top-tier tools. |
| Scan speed | 6/10 | Not the fastest, many competitors beat it in direct comparisons. |
| Ease of use | 8/10 | One of its strengths. Easy for anyone to use, with a modern, clean interface. |
| Value for money | 7/10 | Fair pricing overall, especially lifetime licenses. But you can get better performance or more features elsewhere in the same range. |
🌟 Overall Score: 6.9 / 10
Tenorshare 4DDiG is a decent mid-range data recovery option. It’s beginner-friendly, covers all the basics, and includes bonus features like built-in photo/video repair that many rivals don’t offer at this price point.
But if you stack it next to the closest competition, that repair feature is the only real standout. When it comes to recovery success, performance speed, or polish, there are better tools out there.
We think 4DDiG makes sense if:
- You’re a casual user who values simplicity.
- You’re dealing with damaged media and want an all-in-one that includes photo/video repair.
- You find it on sale (especially lifetime).
But if you care more about scan depth, broader compatibility, or advanced imaging and backup workflows, you might outgrow 4DDiG fast.


