 In this UFS Explorer Professional Recovery review, our team took a close look at a tool that often gets labeled as “professional-grade” in recovery circles. We break down its core features, test how it behaves in real recovery scenarios, and compare it with established alternatives. All this to help you understand where it stands, and whether the asking price makes sense for the kind of work you actually do.
Quick Verdict
Best for: Tech-savvy users who need advanced recovery options, including RAID, Linux file systems, and imaging tools, all in a single cross-platform package.
UFS Explorer Professional Recovery is good software, but not the tool we’d recommend for most home users. It shines in technical environments (RAID recovery, Linux volumes, and raw imaging are all here) but comes with a steep learning curve, a limited demo, and a UI that assumes you know what you’re doing. If you’re a data recovery enthusiast, it’s a capable choice. For casual use or simple undeletes, it’s probably more tool than you need.
Pros
- Supports a wide range of file systems (NTFS, exFAT, APFS, Ext4, ZFS, ReFS, and more)
- Supports automatic and manual RAID reconstruction.
- Disk imaging built-in.
- Works on Windows, macOS, and Linux.
- Forensic-level control.
- Actively maintained.
- Outdated UI
- Steep learning curve.
- Pro edition costs more than many alternatives.
- Limited demo.
- You have to wait for the scan to finish to preview files.
- No built-in file repair.
UFS Explorer Professional Recovery Overview
UFS Explorer Professional Recovery comes from SysDev Laboratories. In tech circles, it has a reputation as a serious solution for complex cases – far beyond what most consumer-level software tries to handle. People talking about it on forums often mention its broad file system support and the level of control it gives you, even if the interface doesn’t feel modern.
SysDev offers several UFS Explorer editions with different capability levels. But our review focuses specifically on UFS Explorer Professional Recovery.
Supported File Systems and Operating Systems
This is one of the areas where UFS Explorer Professional Recovery clearly shows who it’s built for. It runs on Windows, macOS, and Linux, and the feature set stays largely consistent across all three.
You don’t get a “lite” version on one platform and a full one on another. The only real limitation to keep in mind is licensing: each OS requires its own license, so switching platforms isn’t friction-free.
On the file system side, coverage is broad enough to handle most real-world recovery jobs without workarounds.
- On Windows media, it supports FAT variants, exFAT, NTFS, and ReFS.
- For macOS, it works with both HFS+ and APFS. However, the software can’t directly access internal system drives (you won’t be able to scan the Mac’s internal system disk itself).
- Linux file systems are where it starts to separate itself from consumer tools: Ext2/3/4, XFS, JFS, ReiserFS, Btrfs, and F2FS are all supported, along with LVM layouts and thin provisioning.
- It also handles ZFS volumes, including RAID-Z configurations, which is still rare outside professional tools.
The support doesn’t stop at standard disks. UFS Explorer understands VMware VMFS and other virtualization formats, optical file systems like ISO9660 and UDF, and a range of legacy or niche systems you don’t expect to see anymore but still run into during recovery work. If you’ve ever opened a disk image and thought “what even is this file system,” chances are UFS Explorer recognizes it.
File Type Support and Custom IntelliRAW Rules
UFS Explorer doesn’t advertise a fixed number of supported file types, and it doesn’t need to. When file system metadata is intact, it recovers files through direct structure parsing (which covers all common formats with full names and folder paths).

If the file system is damaged, the software falls back to IntelliRAW content-based recovery. The built-in rules handle the usual mix of documents, photos, videos, archives, and media files you run into during real recovery work.
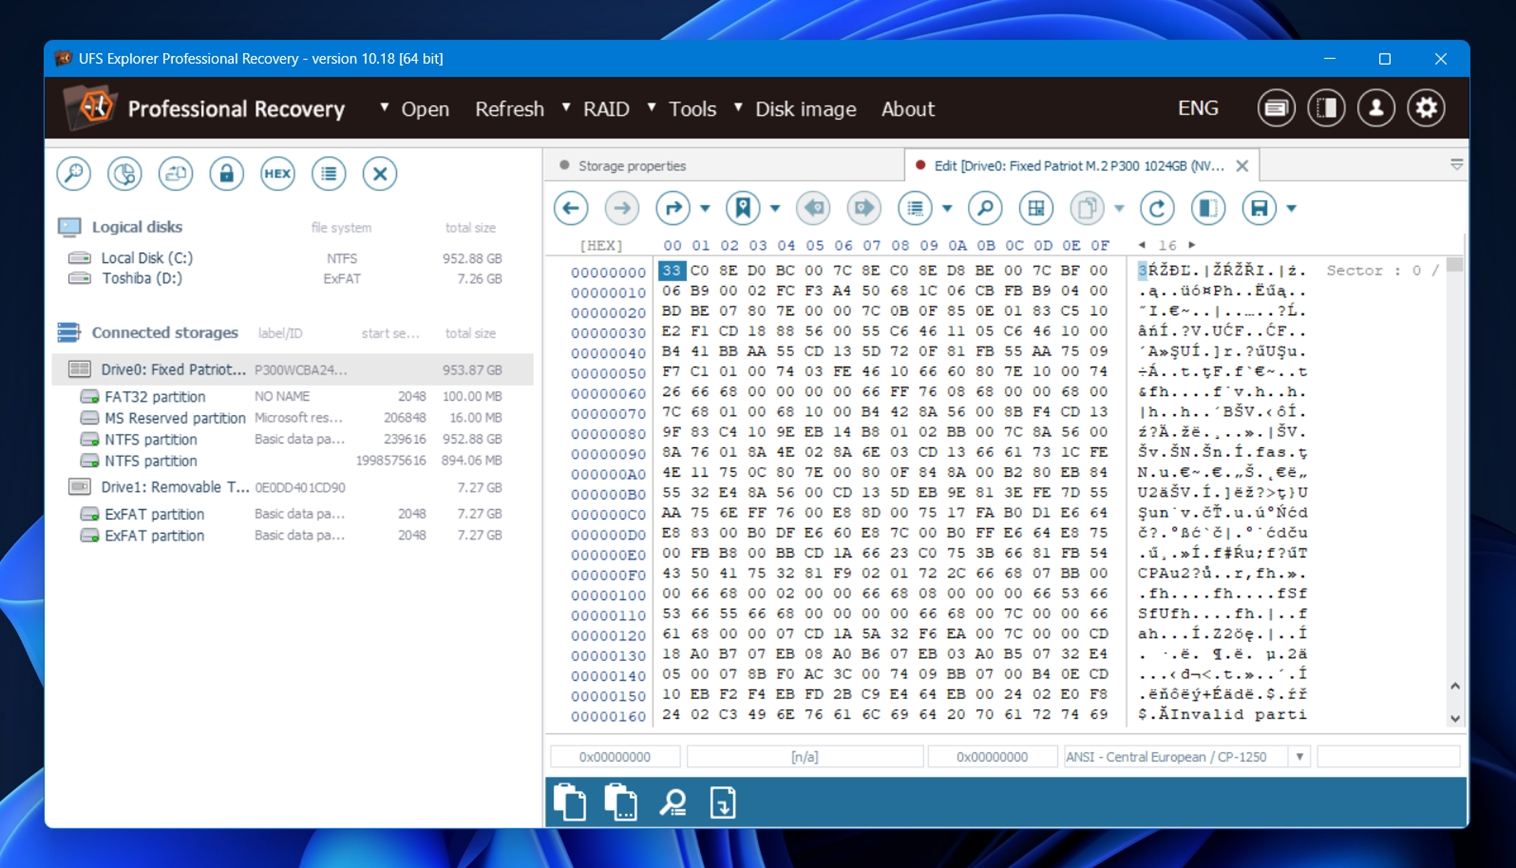
When a format isn’t recognized, you can define it yourself. UFS Explorer includes a file signature editor and hex viewer that let you create custom IntelliRAW rules by specifying headers, footers, and block behavior. That makes it possible to recover proprietary or uncommon file types.
RAID Recovery
RAID recovery is one of the main reasons people end up using UFS Explorer Professional Recovery in the first place.
The software supports most RAID levels you’ll encounter in the wild: RAID 0, 1, 3, 5, 6, 10, 50, 60, and a few less common variants like RAID 1E and nested layouts.

It works with both software and hardware RAID, including arrays created by Windows Dynamic Disks, Linux mdadm, Apple CoreStorage, and Storage Spaces.
UFS Explorer can automatically detect RAID parameters from disks pulled out of NAS units or external enclosures. That includes vendor-specific layouts from systems like Synology, QNAP, Drobo (BeyondRAID), and various RAID controllers. If metadata is intact, arrays often assemble themselves with little manual input.
The built-in RAID Builder lets you define stripe size, disk order, parity rotation, and offsets by hand. You can test layouts quickly, preview file systems, and adjust parameters until the structure makes sense. This is the part where experience matters, and the software doesn’t hide that reality.
Disk Imaging and Extra Tools
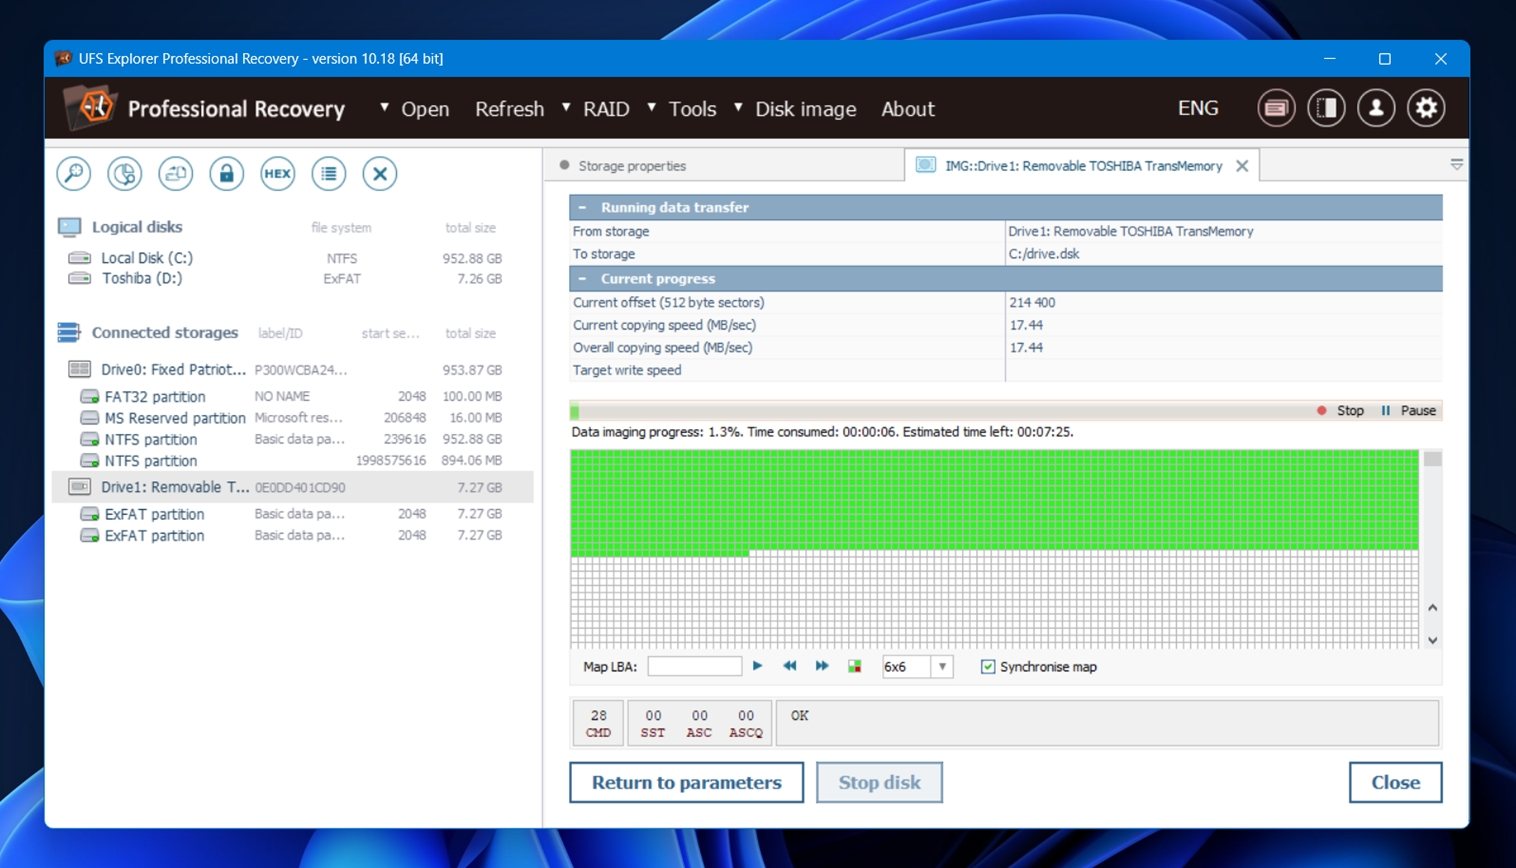
UFS Explorer also includes a disk imaging tool. You can create raw or forensic images and work from those instead of the original drive, which is often the safer move with unstable media. The read-once mode limits repeated access to the same sectors and writes data straight into a sparse image.
As for extras, there’s a rather small collection of tools:
- S.M.A.R.T. monitoring gives you a quick look at drive health.
- Parity calculator comes in handy when you’re trying to validate RAID assumptions or test recovery ideas on custom arrays.
- You also get access to DeepSpar Terminal if you’re using DDI gear, and several other niche tools like storage comparison and iSCSI export, which might matter once your recovery scenarios get more layered.
UI and Navigation
UFS Explorer Professional Recovery doesn’t pretend to be friendly to home users, that’s clear the moment you open it. The layout feels more like a technician’s toolkit than a consumer app. There’s a lot of nested panels, tiny text, and long dropdowns. Navigation works fine once you learn the flow, but it’s not intuitive for anyone walking in cold.
And other UFS Explorer versions don’t really improve things. They all share the same look and feel, with slight differences in available features but not in design.
The good news is the developer seems to know this isn’t the most intuitive tool. Their website has a pretty decent knowledge base with step-by-step guides.
How We Tested the Software
Now let’s get to the more practical side of things. First, the methodology.
We tested UFS Explorer Professional Recovery on three common data loss scenarios:
- Case 1 (Deleted files on an HDD). We used a 1 TB Seagate filled with a folder tree containing around 100 mixed files. We deleted the contents and cleared the Recycle Bin to simulate permanent deletion on a Windows system.
- Case 2 (RAW SD card). A 64 GB Samsung EVO Plus microSD card was manually corrupted by modifying the partition table. As expected, Windows showed it as RAW and asked to reformat. We didn’t.
- Case 3 (Quick-formatted USB drive). We quick-formatted a 16 GB SanDisk USB 3.0 drive to exFAT – a very common mistake.
In all three test cases, we used the same data set (about 750 MB of mixed files) to keep things consistent. The files were spread across a folder structure that mimics how people usually store their data
Here’s a quick look at the file types involved:
- Photos – JPG, PNG
- Camera RAW – CR2, NEF, ORF
- Videos – MP4, MOV, GoPro footage
- Documents – DOCX, PDF, TXT
- Audio – MP3, FLAC
- Other – ZIP archives, EXE installers
What We Measured
Recovery performance matters, but it doesn’t tell the whole story. A tool might bring back your files, but if it takes forever, crashes mid-scan, or buries the results under a messy folder tree, that’s a problem too. So here’s what we paid attention to during testing:
| Metric | What We Looked At |
| Recovery success | How many files came back intact and usable |
| Scan speed | Time to complete a full scan + general responsiveness |
| Ease of use | How intuitive the workflow felt + how smooth navigation was |
| Value for money | What you get for free vs. what unlocks when you pay |
We’ll use these scores to guide our final verdict later in the review.
What It’s Like to Use UFS Explorer
We already mentioned that UFS Explorer isn’t the most user-friendly tool out there, but once you’ve gone through it once, it’s not that complicated either, if you’re dealing with 99% of typical data loss situations.
- First, the installation. Nothing unusual there. You can download the installer directly from the official site. It runs like most standard Windows or macOS installers. You can change the install path if needed, which is important if you’re trying to recover data from your system drive. And to their credit, the installer does show a warning for this.
- Once it’s running, you’re dropped into a dense, technical view: disks on the left, info on the right, tabs up top.
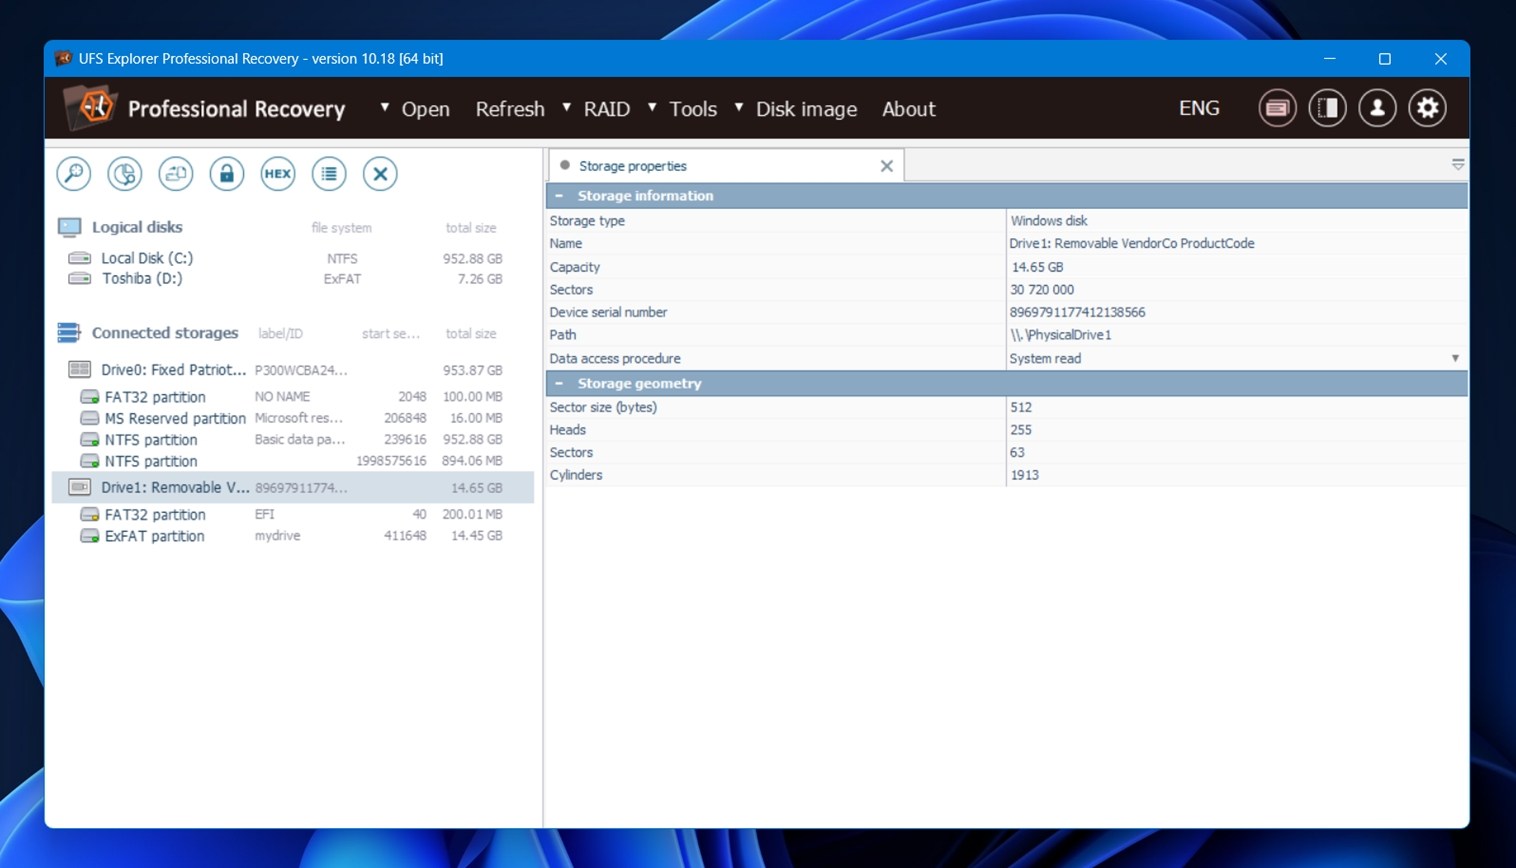
- We plugged in our test drive, and it showed up.
- From there, we clicked the “Scan for lost data” button, which opened up the scan settings window; it gives you several scan options: scan the full drive, scan just free space, target specific partitions.
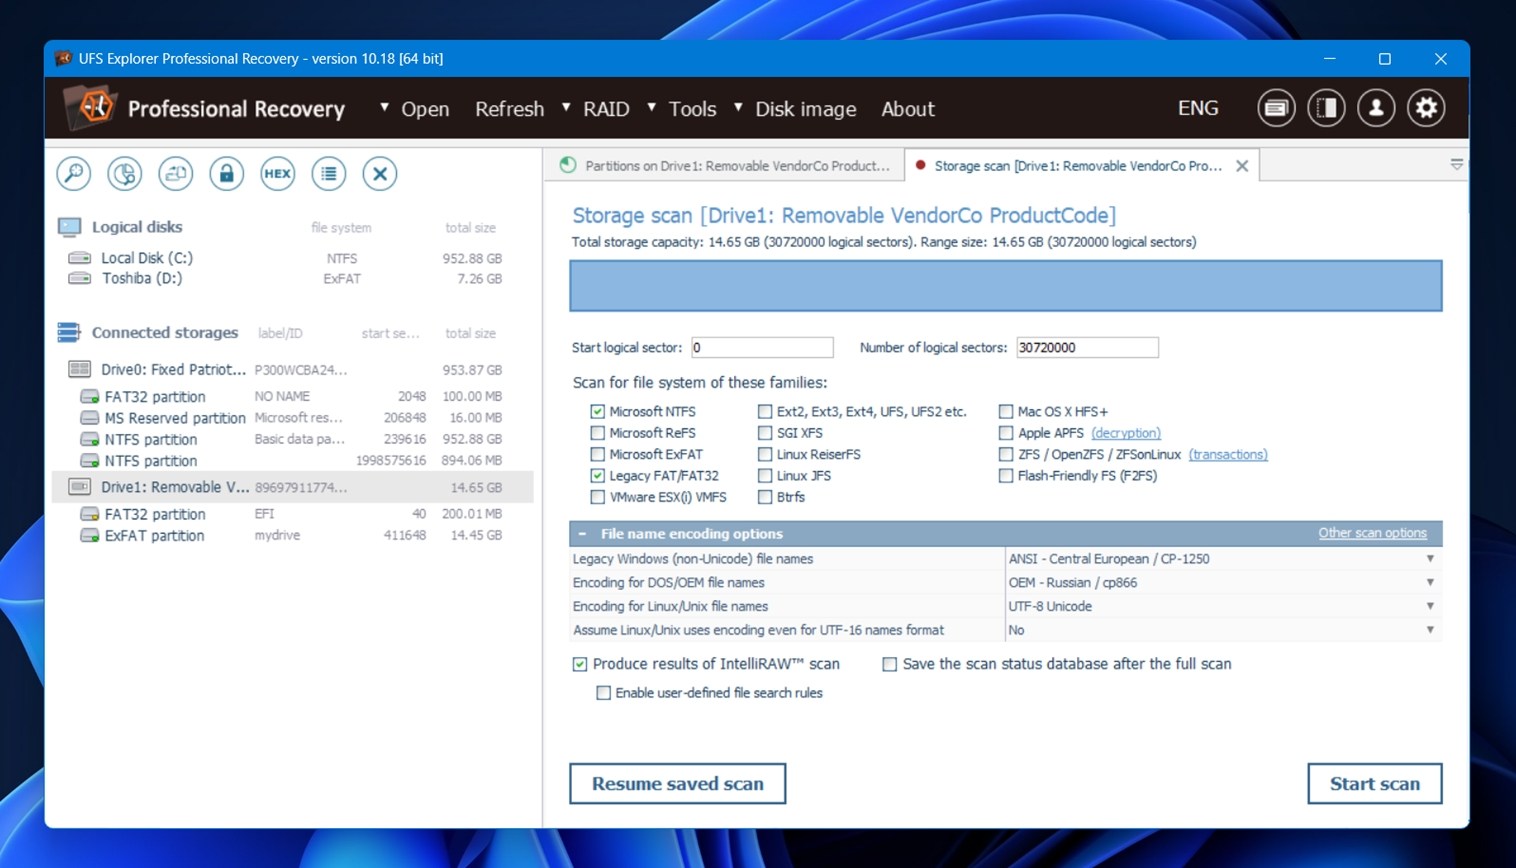 We left the defaults alone: full drive scan, index file systems, and include unused space. There is also the IntelliRAW option (UFS Explorer’s content-aware scanning). We enabled it, and the scan started.
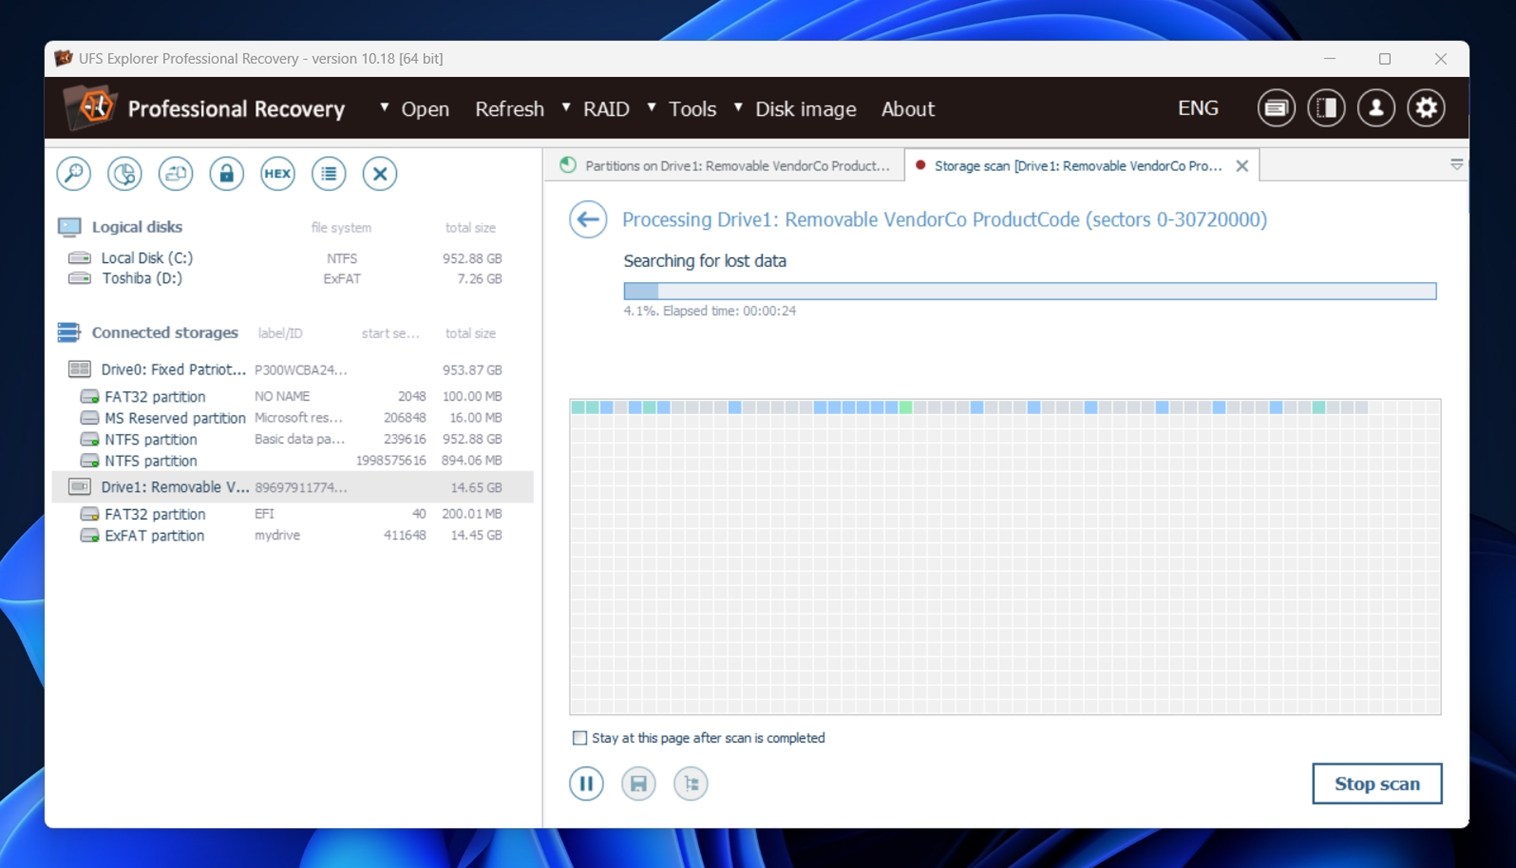
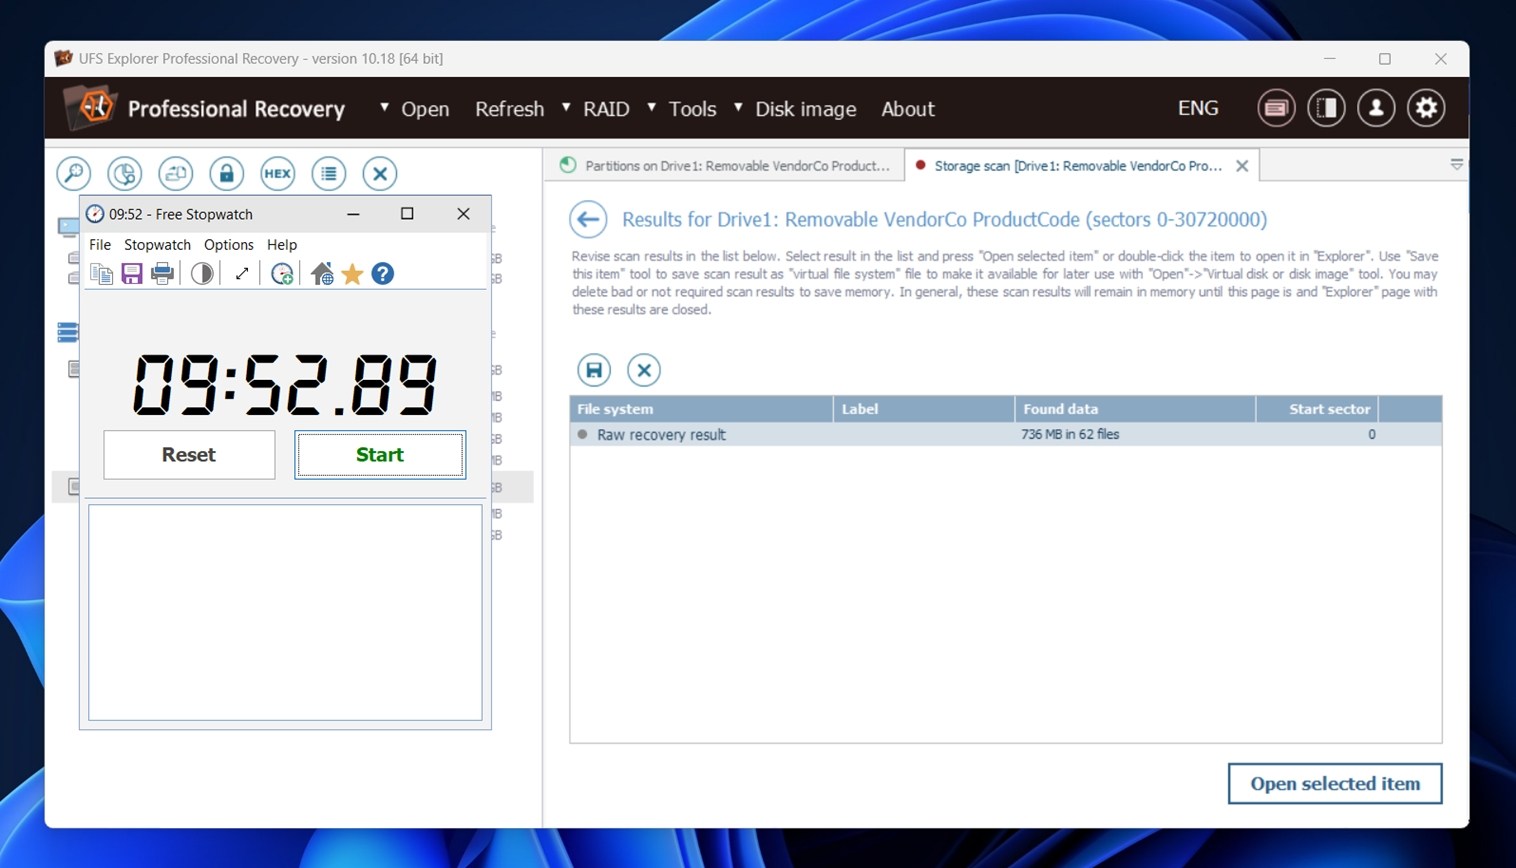
- While the scan runs, you don’t get real-time feedback on what’s being found. No live file list. With some other tools, you can start exploring results while the scan is in progress, but here, you’ll be waiting until it’s done.
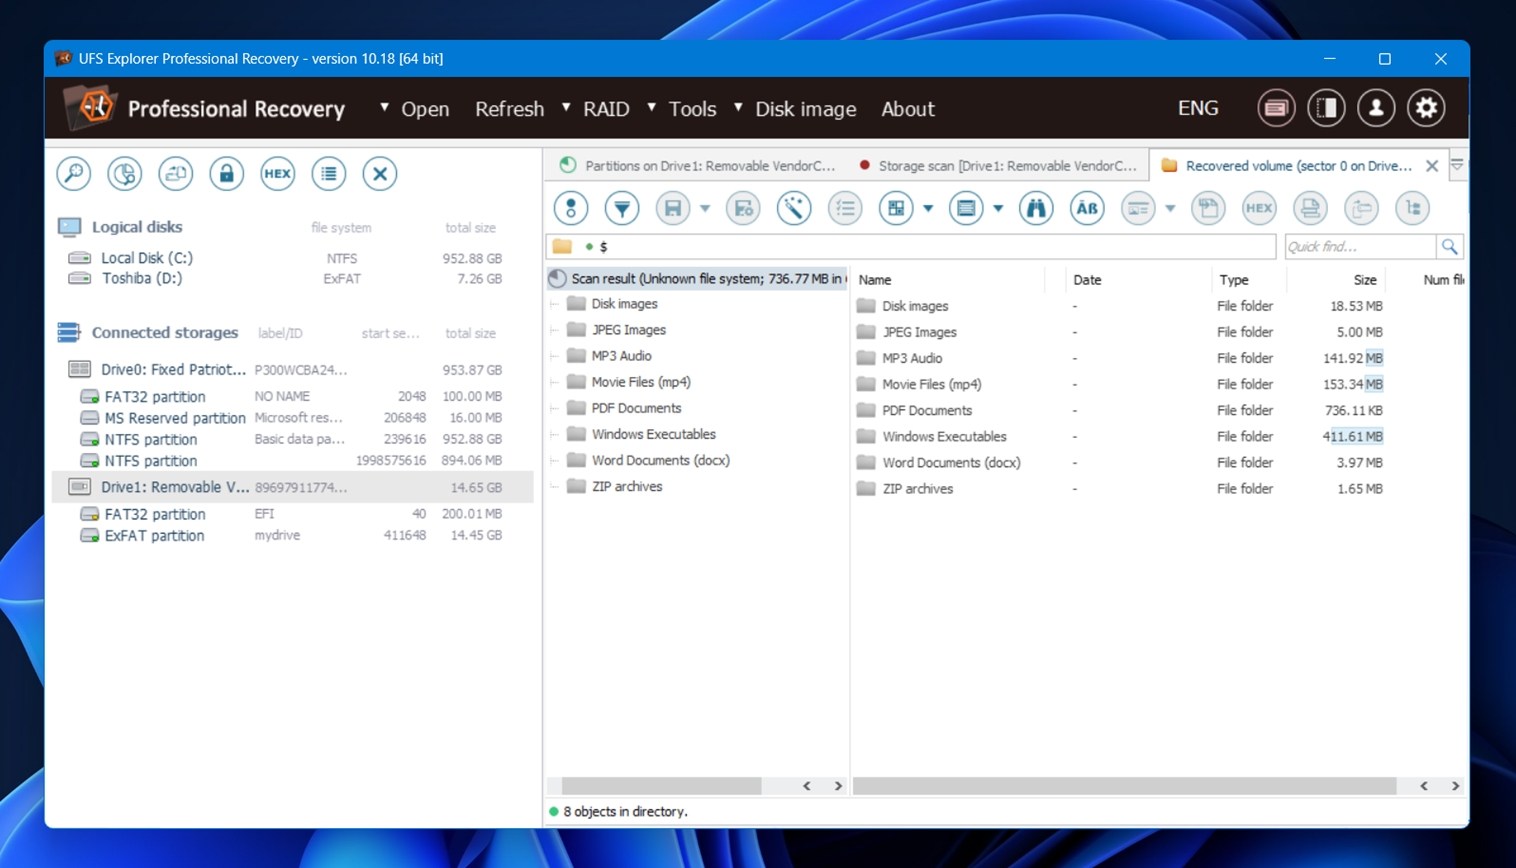
- Once complete, recovered files were neatly sorted.
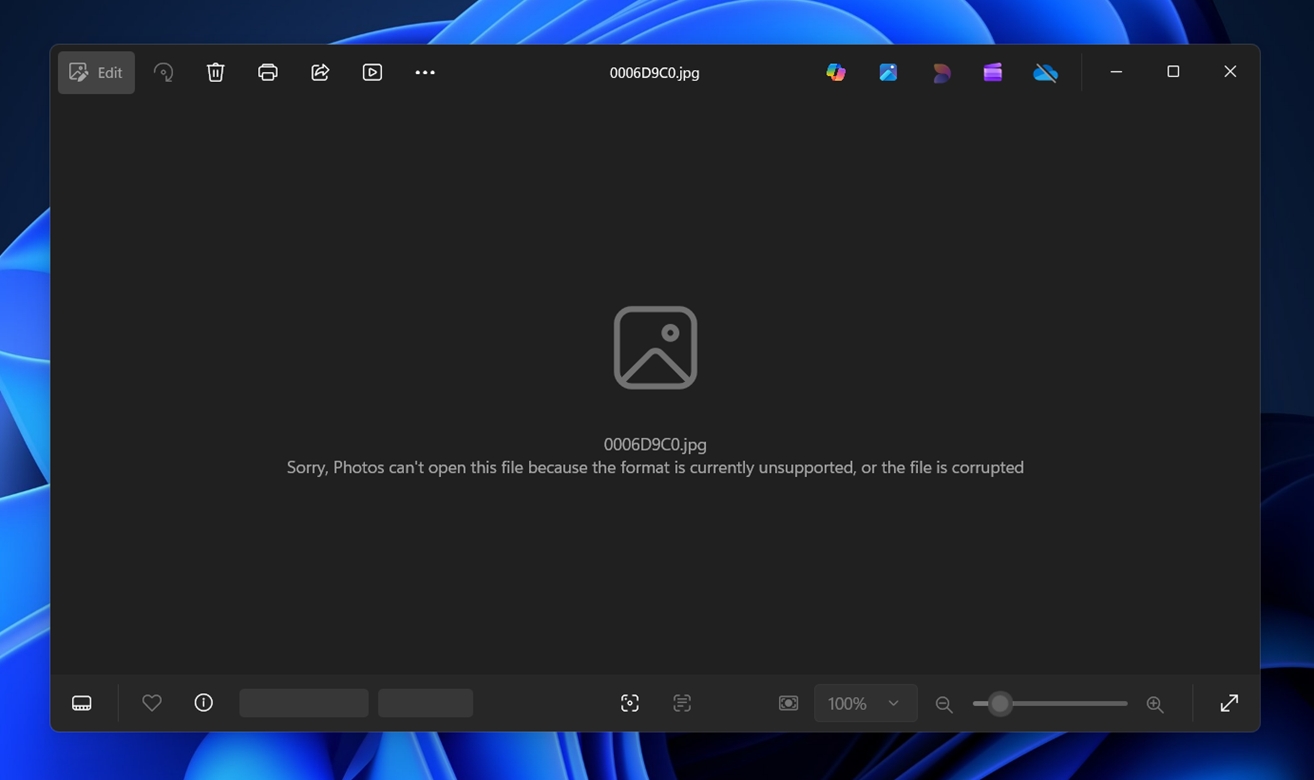
 But then we hit a snag: previews. A good chunk of the recovered files couldn’t be previewed.
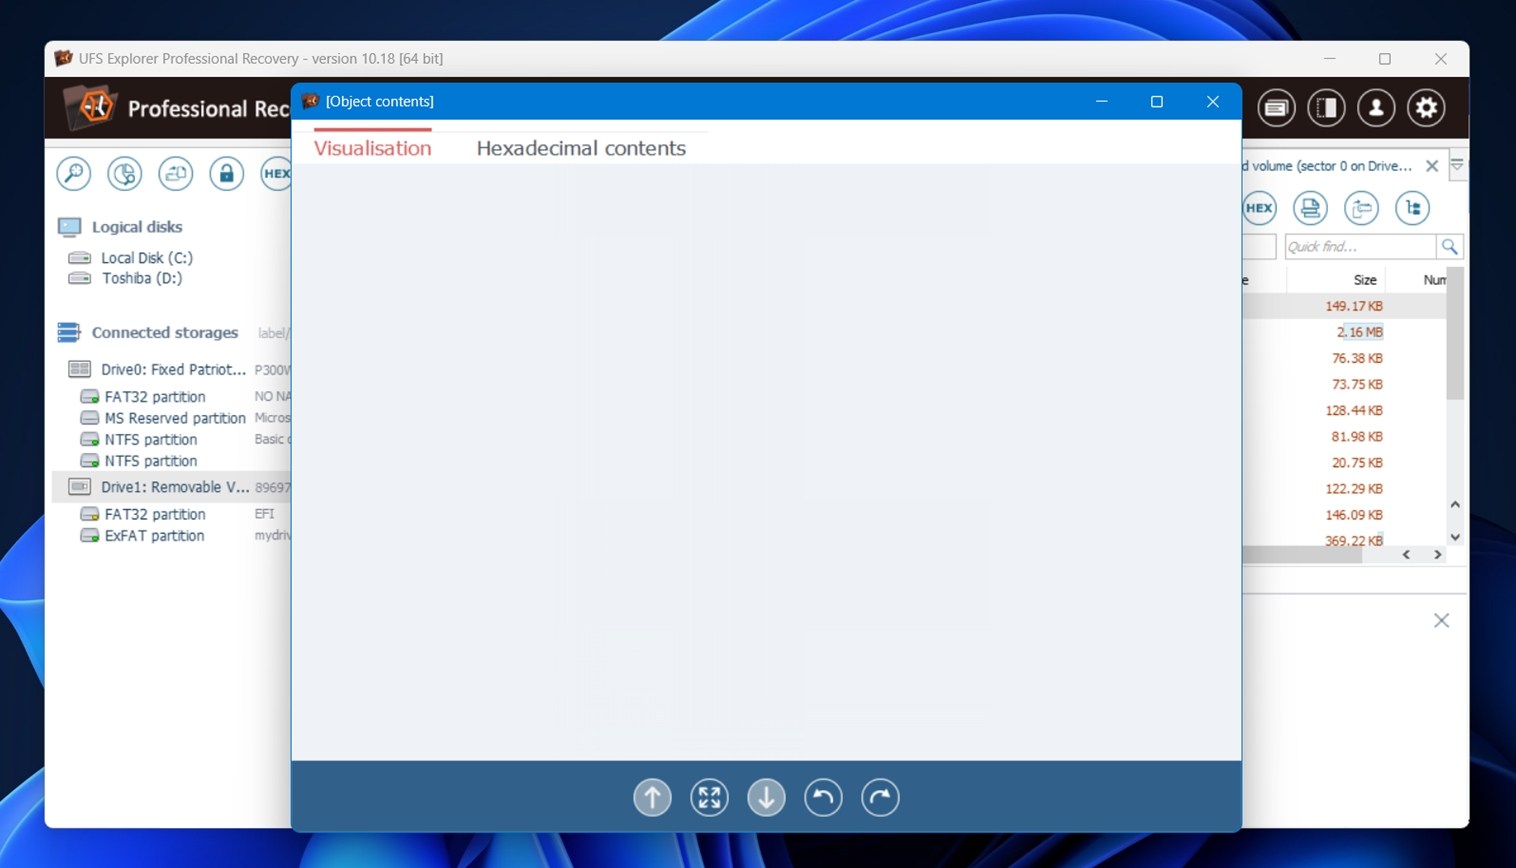 We were greeted with a blank panel like the one in the screenshot. Some files did preview fine (mostly smaller documents), but others, larger ones like videos or RAW photos… just nothing.
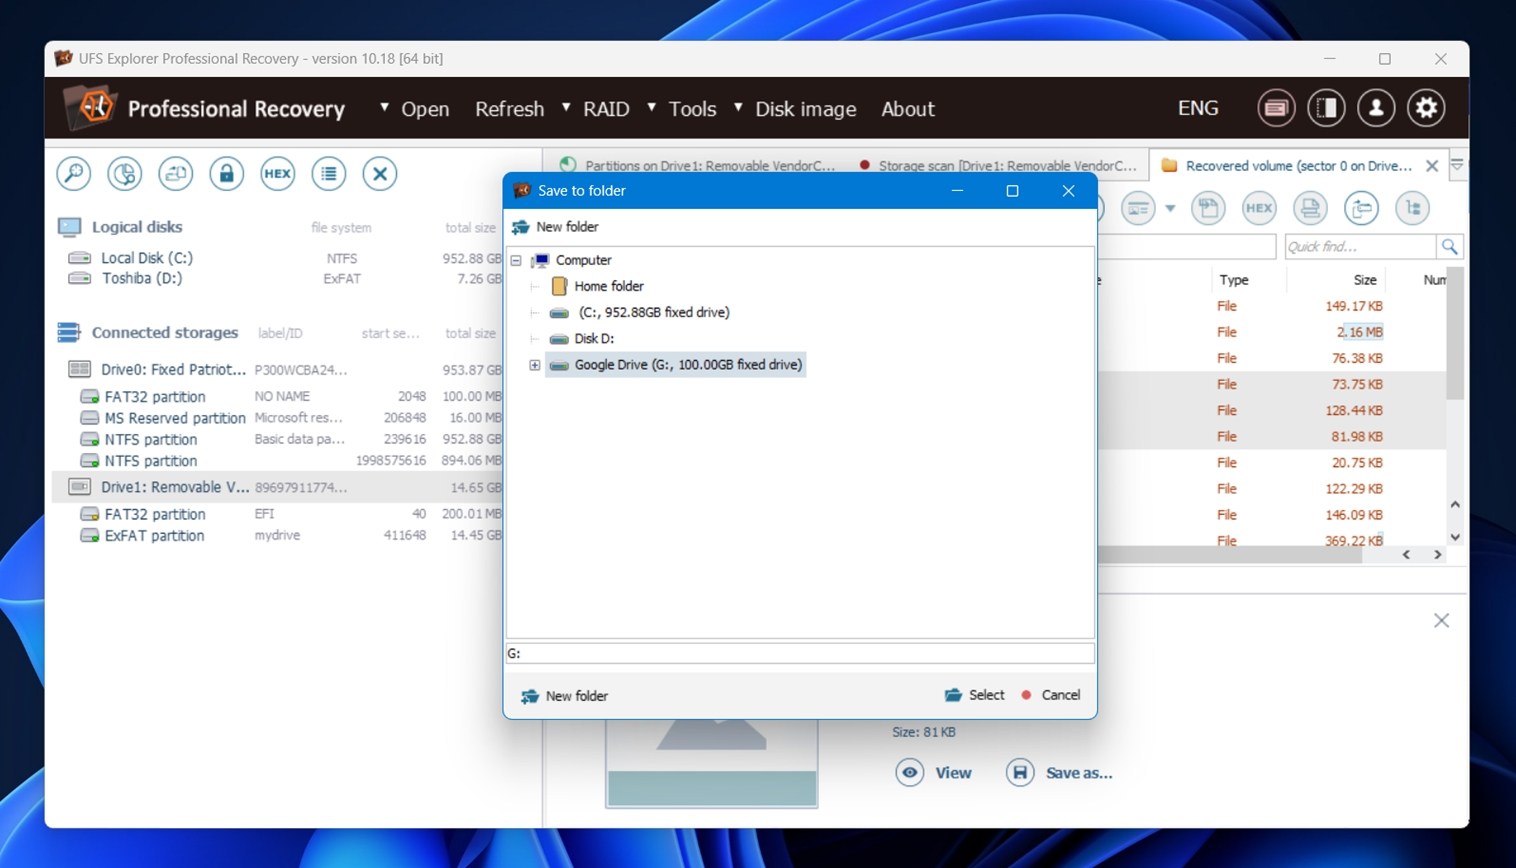
 - To select the files you want to recover, you can either right-click on the scan result and choose “Save all selection”, or go manual with Ctrl+Click or Shift+Click if you want to hand-pick specific files. There’s no checkbox interface here.
- After selecting what we wanted, we picked an output folder, and recovery was completed.
Overall, not the most pleasant recovery software we’ve used. Functionally, it gets the job done, but it lacks a lot of quality-of-life features that could make it easier to work with. Real-time scan results, file checkboxes, clearer selection feedback, smarter preview fallback… these things wouldn’t affect the recovery engine itself, but they’d go a long way in making the experience smoother.
Recovery Performance
Now to the part that really matters: results. Here’s a breakdown of what we saw:
| Scenario | Recovery Success Rate* | Scan Time (mins) | Notes |
| Case 1: 1 TB Seagate HDD (Deleted Files) | ~91% (DOCX, PDF, JPG near-perfect) | ~110 | Folder structure preserved, most files opened fine. Strongest overall. |
| Case 2: 64 GB SD card (RAW) | ~68% (best on JPG/ORF, video hit-or-miss) | ~45 | Some large files like video clips recovered but unplayable. Filenames generic. |
| Case 3: 16 GB USB (Quick Format) | ~63% (solid on small docs/audio) | ~10 | Many files restored, but no folder structure. Previews failed on some JPGs. |
*Recovery success here means files that opened fully and worked after recovery.
For documents, recovery was consistent. DOCX, XLSX, PDFs all opened fine in every scenario. That’s about as clean as it gets. For photos and videos, it depended on the condition of the file system. Deleted file recovery worked well.
In RAW and formatted cases, recovery relied on IntelliRAW, which brought some impressive results but also quite a few broken files. We often saw this.
In terms of speed, UFS Explorer holds up really well. It’s comparable with the fastest recovery tools we’ve tested. The full scan of our 16 GB USB 3.0 stick, with IntelliRAW enabled, finished in just under 10 minutes. That’s a solid result for a deep scan. The RAW SD card took a bit longer (around 45 minutes), but again, totally within expectations.
To put it short: decent results.
Price Breakdown
Now let’s talk money. UFS Explorer Professional Recovery is far from the cheapest option on the market, and it’s pretty clear this tool is geared toward professional or enterprise environments.
Here’s how the pricing breaks down depending on the number of seats:
| Seats Allowed | Price | Intended Use |
| 1 Seat | $679.95 | Single technician setup |
| Up to 3 Seats | $1129.95 | Small team or lab |
| Up to 10 Seats | $2259.95 | Medium-sized business |
| Up to 30 Seats | $4529.95 | Enterprise or data center use |
Each license includes:
- Unlimited-time usage
- 360 days of free updates
- All usage types (personal, commercial, educational)
The license is tied to the number of workstations (not users), and it’s a cloud-based license by default, though you can request a dongle or software-locked version if needed.
If you don’t purchase a license, UFS Explorer Professional Recovery runs in demo mode, which limits recoverable files to 768 KB or smaller. In practice, that’s extremely restrictive. Most real-world file types will be too large to recover without unlocking the software. If you were planning on using it for free, you’re better off looking for a UFS Explorer free alternative, something like Recuva, which is unlimited, or Disk Drill, which has a more generous demo.
How UFS Explorer Professional Compares to Other Power Tools
Speaking of alternatives…
If UFS Explorer Pro isn’t quite clicking for you, it makes sense to see how it stacks up against some of its closest competitors.
Let’s look at it side-by-side with Disk Drill and R-Studio, two well-known recovery tools:
| Feature | UFS Explorer Pro | Disk Drill PRO | R-Studio Technician |
| Price | $679.95 (1 seat, commercial) | $89 (lifetime license) | $899.99 (Technician) |
| Demo / Free limits | Save only files < 768 KB | Windows free recovery is up to 100 MB | Demo save limit stated as < 1024 KB |
| OS support | Windows, macOS, Linux (separate licensing per OS is typical) | Windows + macOS | Windows, macOS, Linux |
| Disk imaging | Yes (includes imaging-focused workflow) | Yes (byte-to-byte backups) | Yes (byte-by-byte imaging + forensic formats listed) |
| RAID work | Full RAID reconstruction + custom layouts (this is a core strength) | RAID recovery supported | Technician package targets advanced recovery setups, includes hardware/network recovery tooling |
Now let’s unpack that.
- If you want the closest match to UFS Explorer’s “serious lab tool” vibe, R-Studio Technician sits nearest. The price jump is real, but it also targets service work and includes Technician-specific extras like Agent/Emergency tooling and hardware support notes on the vendor side.
- If you want something that is still “pro”, but you don’t want to fight the interface all day, Disk Drill PRO is easier to live with. The free tier also gives you a more practical test run than a sub-1 MB cap, which matters when you try to validate recoverability before you spend money. If you’re not a forensic analyst, Disk Drill is likely the better UFS Explorer alternative. It gives you more upfront and gets the job done without forcing you to learn.
- If RAID rebuild work (NAS pulls, missing members, weird offsets) sits on your weekly menu, UFS Explorer Professional Recovery keeps its place because it treats RAID reconstruction as a primary workflow, not a side feature.
User Feedback and Ratings
Now, let’s talk real-world feedback, aka what people say after they’ve lived with the tool.
UFS Explorer Professional Recovery doesn’t have a huge “review footprint” on the big consumer platforms. That tracks. This is niche software, so most feedback shows up in forums, Reddit, lab circles, and occasional review sites, not in piles of Trustpilot-style ratings.
That said, if you go by the official testimonial page, you’ll find a stream of glowing endorsements. Whether you choose to trust those is up to you.
Our Verdict
Here’s our final take in this UFS Explorer review:
| Metric | Score | Notes |
| Recovery success rate | 8 / 10 | Good performance overall. It handled deleted files, formatted partitions, and raw data well, though some recovered files were occasionally corrupted. |
| Scan speed | 8 / 10 | Fast for basic scans, but deep RAID analysis and advanced RAW recovery can take time. That’s expected for this class of tool. |
| Ease of use | 6 / 10 | Not beginner-friendly. Interface feels dated and assumes you know what you’re doing. Steep learning curve for casual users. |
| Value for money | 6 / 10 | The Pro version is powerful but expensive. The demo limits recovery to 768 KB files (basically unusable for testing real-world scenarios). |
Final Score: 7 / 10
UFS Explorer Professional Recovery is a technically strong solution for recovering data from complex setups like RAID, Linux file systems, and encrypted volumes. It performs well on raw recovery and handles oddball formats and partition issues that may trip up simpler tools.
But this power comes with tradeoffs. The UI is built for experts, and there’s virtually no free trial usability. For regular users or one-off recovery jobs, the cost and complexity won’t make sense.
If you’re dealing with enterprise-level recovery tasks, forensic data work, or advanced Linux systems, UFS Explorer Pro is a strong option. But for typical home or office users, it’s likely overkill.


